@a-sync/opencv4nodejs 中文文档教程
opencv4nodejs
通过从本质上讲,JavaScript 缺乏有效执行计算机视觉任务的性能。 因此,此包将原生 OpenCV 库的性能带入您的 Node.js 应用程序。 该项目以 OpenCV 3 为目标,并提供异步和同步 API。
该项目的最终目标是为 OpenCV 和 OpenCV-contrib 的 API 提供 Node.js 绑定的综合集合模块。 可在 API 文档 中找到可用绑定的概述。 此外,高度赞赏贡献。 如果您想参与其中,可以查看贡献指南。< /a>
- Examples
- How to install
- Usage with Docker
- Usage with Electron
- Usage with NW.js
- Quick Start
- Async API
- With TypeScript
- External Memory Tracking (v4.0.0)
- Available Modules
Examples
查看示例 用于实施。
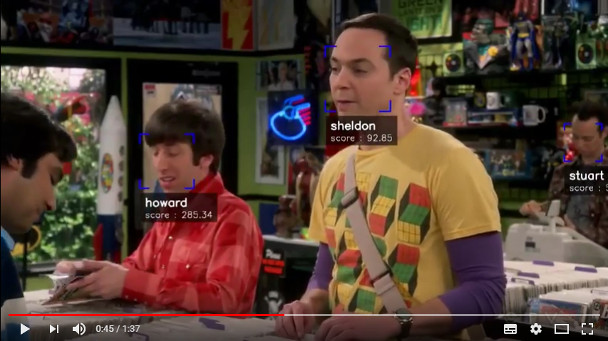
Face Detection
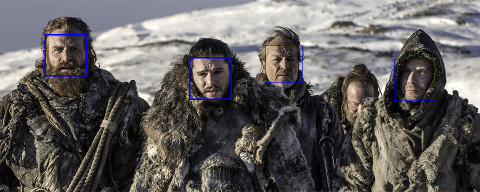
Face Recognition with the OpenCV face module
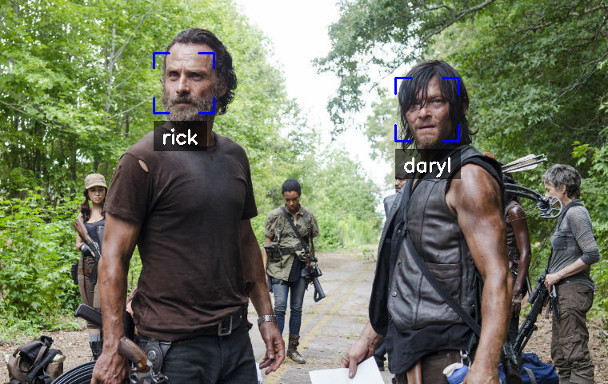
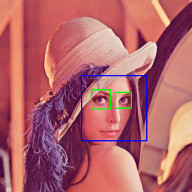
Face Landmarks with the OpenCV face module

Face Recognition with face-recognition.js
查看Node.js + face-recognition.js:使用深度学习进行简单而稳健的人脸识别。
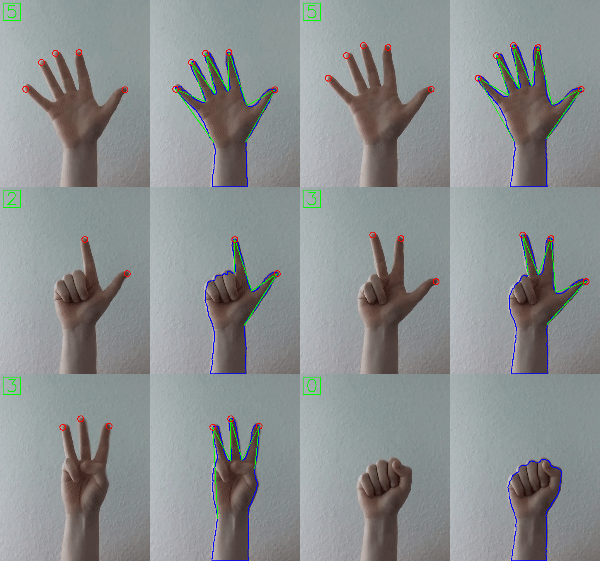
Hand Gesture Recognition
查看 使用 OpenCV 和 JavaScript 的简单手势识别。
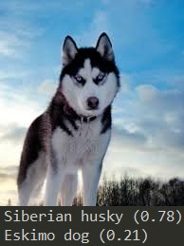
Object Recognition with Deep Neural Networks
查看 Node.js 遇见 OpenCV 的深度神经网络 — Tensorflow 和 Caffe 的乐趣。
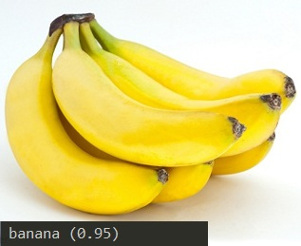
Tensorflow Inception
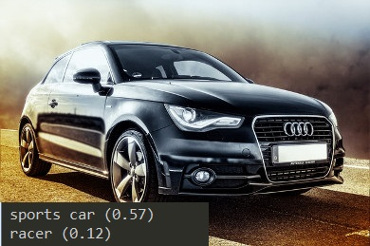
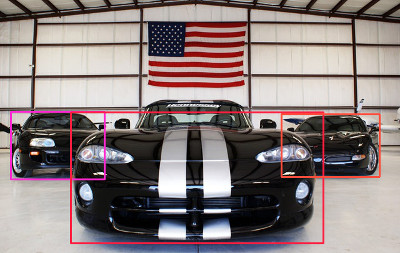
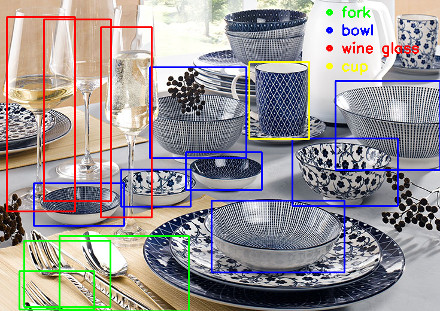
Single Shot Multibox Detector with COCO

Machine Learning
查看 机器学习与 OpenCV 和JavaScript:使用 HOG 和 SVM 识别手写字母。

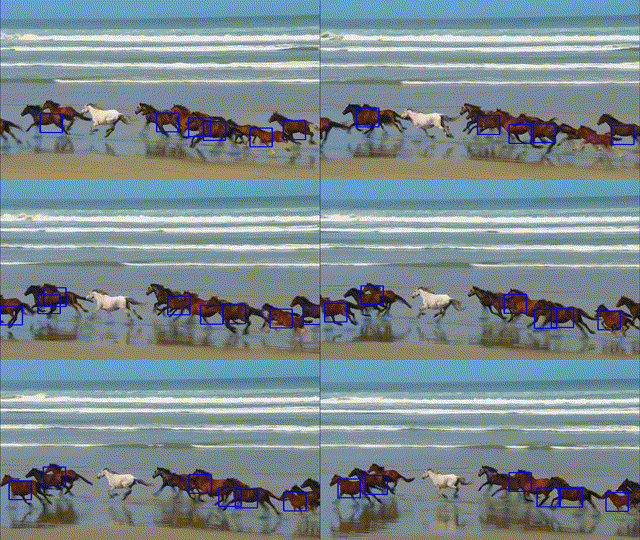
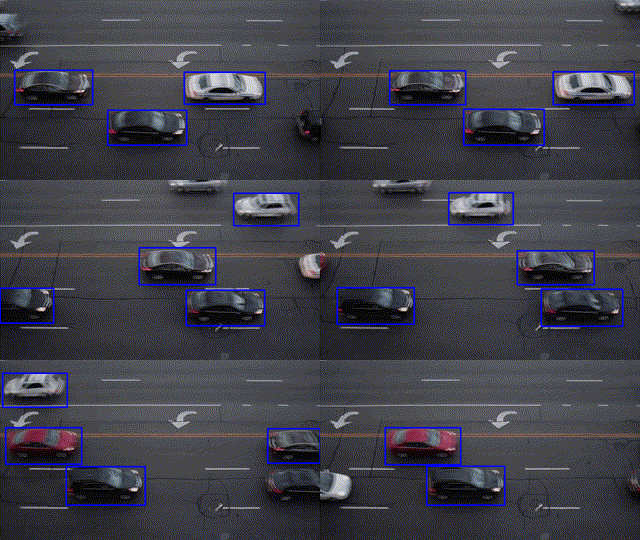
Object Tracking

Feature Matching

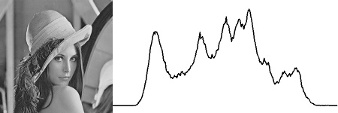
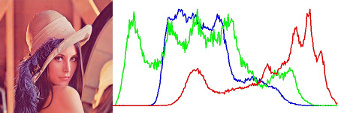
Image Histogram

How to install
重要说明:node-gyp 不会正确处理空格,因此请确保项目目录的路径不包含任何空格。 :\
Requirements
- cmake (unless you are using a prebuilt OpenCV release)
On Windows
在 “ C 编译 OpenCV 和 opencv4nodejs 的工具。 如果您没有安装 Visual Studio 或 Windows 构建工具,您可以轻松安装 VS2015 构建工具:
npm install --global windows-build-tools
Auto build
如果您不想自己设置 OpenCV,您可以简单地让这个包自动安装 OpenCV 3.4 + OpenCV contrib 3.4(可能需要一些时间):
$ npm install --save opencv4nodejs
Manual build
自行设置 OpenCV 需要设置环境变量: OPENCV4NODEJS禁用AUTOBUILD=1。
您可以安装任何 OpenCV 3+ releases(注意,这将没有contrib) 或使用或不使用 OpenCV contrib 自行从源代码构建 OpenCV。 在 Linux 和 MacOSX 上,库应该安装在 usr/local 下(这是默认设置)。
On Windows
如果您选择自己设置 OpenCV,则必须在安装 opencv4nodejs 之前设置以下环境变量:
- OPENCVINCLUDEDIR pointing to the directory with the subfolders opencv and opencv2 containing the header files
- OPENCVLIBDIR pointing to the lib directory containing the OpenCV .lib files
此外,您还需要将 OpenCV 二进制文件添加到系统路径:
- add an environment variable OPENCVBINDIR pointing to the binary directory containing the OpenCV .dll files
- append
;%OPENCV_BIN_DIR%;to your system path variable
注意:在对环境进行更改后重新启动当前的控制台会话。
如果您遇到问题,请检查特定于您的操作系统的 node-gyp 要求:https://github.com/nodejs/node-gyp。
Usage with Docker
opencv-express - example for opencv4nodejs with express.js and docker
或者简单地从 justadudewhohacks/opencv-nodejs 对于全局安装了 opencv4nodejs 的 opencv-3.2 + contrib-3.2:
FROM justadudewhohacks/opencv-nodejs
注意:上述 Docker 镜像已经全局安装了 opencv4nodejs。 为了防止在 npm install 期间出现构建错误,您的 package.json 不应包含 opencv4nodejs,而应包含/需要全局包通过绝对路径要求它或在 Dockerfile 中将 NODE_PATH 环境变量设置为 /usr/lib/node_modules 并像往常一样要求包。
可以在此处找到不同的 OpenCV 3.x 基础图像:https://hub.docker.com/r/justadudewhohacks/。
Usage with Electron
opencv-electron - example for opencv4nodejs with electron
将以下脚本添加到您的 package.json:
"electron-rebuild": "electron-rebuild -w opencv4nodejs"
运行脚本:
$ npm run electron-rebuild
在应用程序中需要它:
const cv = require('opencv4nodejs');
Usage with NW.js
任何本机模块,包括 opencv4nodejs,都必须重新编译才能与 NW.js 一起使用。 Use Native 中提供了有关如何执行此操作的说明NW.js 文档的模块 部分。
重新编译后,可以像往常一样安装和需要该模块:
const cv = require('opencv4nodejs');
Quick Start
const cv = require('opencv4nodejs');
Initializing Mat (image matrix), Vec, Point
const rows = 100; // height
const cols = 100; // width

// empty Mat
const emptyMat = new cv.Mat(rows, cols, cv.CV_8UC3);

// fill the Mat with default value
const whiteMat = new cv.Mat(rows, cols, cv.CV_8UC1, 255);
const blueMat = new cv.Mat(rows, cols, cv.CV_8UC3, [255, 0, 0]);

// from array (3x3 Matrix, 3 channels)
const matData = [
  [[255, 0, 0], [255, 0, 0], [255, 0, 0]],
  [[0, 0, 0], [0, 0, 0], [0, 0, 0]],
  [[255, 0, 0], [255, 0, 0], [255, 0, 0]]
];
const matFromArray = new cv.Mat(matData, cv.CV_8UC3);

// from node buffer
const charData = [255, 0, ...];
const matFromArray = new cv.Mat(Buffer.from(charData), rows, cols, cv.CV_8UC3);

// Point
const pt2 = new cv.Point(100, 100);
const pt3 = new cv.Point(100, 100, 0.5);

// Vector
const vec2 = new cv.Vec(100, 100);
const vec3 = new cv.Vec(100, 100, 0.5);
const vec4 = new cv.Vec(100, 100, 0.5, 0.5);
Mat and Vec operations
const mat0 = new cv.Mat(...);
const mat1 = new cv.Mat(...);

// arithmetic operations for Mats and Vecs
const matMultipliedByScalar = mat0.mul(0.5);  // scalar multiplication
const matDividedByScalar = mat0.div(2);       // scalar division
const mat0PlusMat1 = mat0.add(mat1);          // addition
const mat0MinusMat1 = mat0.sub(mat1);         // subtraction
const mat0MulMat1 = mat0.hMul(mat1);          // elementwise multiplication
const mat0DivMat1 = mat0.hDiv(mat1);          // elementwise division

// logical operations Mat only
const mat0AndMat1 = mat0.and(mat1);
const mat0OrMat1 = mat0.or(mat1);
const mat0bwAndMat1 = mat0.bitwiseAnd(mat1);
const mat0bwOrMat1 = mat0.bitwiseOr(mat1);
const mat0bwXorMat1 = mat0.bitwiseXor(mat1);
const mat0bwNot = mat0.bitwiseNot();
Accessing Mat data
const matBGR = new cv.Mat(..., cv.CV_8UC3);
const matGray = new cv.Mat(..., cv.CV_8UC1);

// get pixel value as vector or number value
const vec3 = matBGR.at(200, 100);
const grayVal = matGray.at(200, 100);

// get raw pixel value as array
const [b, g, r] = matBGR.atRaw(200, 100);

// set single pixel values
matBGR.set(50, 50, [255, 0, 0]);
matBGR.set(50, 50, new Vec(255, 0, 0));
matGray.set(50, 50, 255);

// get a 25x25 sub region of the Mat at offset (50, 50)
const width = 25;
const height = 25;
const region = matBGR.getRegion(new cv.Rect(50, 50, width, height));

// get a node buffer with raw Mat data
const matAsBuffer = matBGR.getData();

// get entire Mat data as JS array
const matAsArray = matBGR.getDataAsArray();
IO
// load image from file
const mat = cv.imread('./path/img.jpg');
cv.imreadAsync('./path/img.jpg', (err, mat) => {
  ...
})

// save image
cv.imwrite('./path/img.png', mat);
cv.imwriteAsync('./path/img.jpg', mat,(err) => {
  ...
})

// show image
cv.imshow('a window name', mat);
cv.waitKey();

// load base64 encoded image
const base64text='data:image/png;base64,R0lGO..';//Base64 encoded string
const base64data =base64text.replace('data:image/jpeg;base64','')
                            .replace('data:image/png;base64','');//Strip image type prefix
const buffer = Buffer.from(base64data,'base64');
const image = cv.imdecode(buffer); //Image is now represented as Mat

// convert Mat to base64 encoded jpg image
const outBase64 =  cv.imencode('.jpg', croppedImage).toString('base64'); // Perform base64 encoding
const htmlImg='<img src=data:image/jpeg;base64,'+outBase64 + '>'; //Create insert into HTML compatible <img> tag

// open capture from webcam
const devicePort = 0;
const wCap = new cv.VideoCapture(devicePort);

// open video capture
const vCap = new cv.VideoCapture('./path/video.mp4');

// read frames from capture
const frame = vCap.read();
vCap.readAsync((err, frame) => {
  ...
});

// loop through the capture
const delay = 10;
let done = false;
while (!done) {
  let frame = vCap.read();
  // loop back to start on end of stream reached
  if (frame.empty) {
    vCap.reset();
    frame = vCap.read();
  }

  // ...

  const key = cv.waitKey(delay);
  done = key !== 255;
}
Useful Mat methods
const matBGR = new cv.Mat(..., cv.CV_8UC3);

// convert types
const matSignedInt = matBGR.convertTo(cv.CV_32SC3);
const matDoublePrecision = matBGR.convertTo(cv.CV_64FC3);

// convert color space
const matGray = matBGR.bgrToGray();
const matHSV = matBGR.cvtColor(cv.COLOR_BGR2HSV);
const matLab = matBGR.cvtColor(cv.COLOR_BGR2Lab);

// resize
const matHalfSize = matBGR.rescale(0.5);
const mat100x100 = matBGR.resize(100, 100);
const matMaxDimIs100 = matBGR.resizeToMax(100);

// extract channels and create Mat from channels
const [matB, matG, matR] = matBGR.splitChannels();
const matRGB = new cv.Mat([matR, matB, matG]);
Drawing a Mat into HTML Canvas
const img = ...

// convert your image to rgba color space
const matRGBA = img.channels === 1
  ? img.cvtColor(cv.COLOR_GRAY2RGBA)
  : img.cvtColor(cv.COLOR_BGR2RGBA);

// create new ImageData from raw mat data
const imgData = new ImageData(
  new Uint8ClampedArray(matRGBA.getData()),
  img.cols,
  img.rows
);

// set canvas dimensions
const canvas = document.getElementById('myCanvas');
canvas.height = img.rows;
canvas.width = img.cols;

// set image data
const ctx = canvas.getContext('2d');
ctx.putImageData(imgData, 0, 0);
Method Interface
来自官方文档或 src 的 OpenCV 方法接口:
void GaussianBlur(InputArray src, OutputArray dst, Size ksize, double sigmaX, double sigmaY = 0, int borderType = BORDER_DEFAULT);
转换为:
const src = new cv.Mat(...);
// invoke with required arguments
const dst0 = src.gaussianBlur(new cv.Size(5, 5), 1.2);
// with optional paramaters
const dst2 = src.gaussianBlur(new cv.Size(5, 5), 1.2, 0.8, cv.BORDER_REFLECT);
// or pass specific optional parameters
const optionalArgs = {
  borderType: cv.BORDER_CONSTANT
};
const dst2 = src.gaussianBlur(new cv.Size(5, 5), 1.2, optionalArgs);
Async API
可以通过将回调作为函数调用的最后一个参数传递来使用异步 API。 默认情况下,如果在不传递回调的情况下调用异步方法,则函数调用将产生一个 Promise。
Async Face Detection
const classifier = new cv.CascadeClassifier(cv.HAAR_FRONTALFACE_ALT2);

// by nesting callbacks
cv.imreadAsync('./faceimg.jpg', (err, img) => {
  if (err) { return console.error(err); }

  const grayImg = img.bgrToGray();
  classifier.detectMultiScaleAsync(grayImg, (err, res) => {
    if (err) { return console.error(err); }

    const { objects, numDetections } = res;
    ...
  });
});

// via Promise
cv.imreadAsync('./faceimg.jpg')
  .then(img =>
    img.bgrToGrayAsync()
      .then(grayImg => classifier.detectMultiScaleAsync(grayImg))
      .then((res) => {
        const { objects, numDetections } = res;
        ...
      })
  )
  .catch(err => console.error(err));

// using async await
try {
  const img = await cv.imreadAsync('./faceimg.jpg');
  const grayImg = await img.bgrToGrayAsync();
  const { objects, numDetections } = await classifier.detectMultiScaleAsync(grayImg);
  ...
} catch (err) {
  console.error(err);
}
With TypeScript
import * as cv from 'opencv4nodejs'
查看 TypeScript 示例。
External Memory Tracking (v4.0.0)
自 4.0.0 版本发布以来,默认启用外部内存跟踪。 简单的说,分配给Matrices(cv.Mat)的内存会被手动报告给node进程。 这解决了垃圾收集不一致的问题,在版本 4.0.0 之前,该问题可能导致节点进程的内存使用量激增,最终导致系统 RAM 溢出。
请注意,在需要模块之前,可以通过设置环境变量 OPENCV4NODEJS_DISABLE_EXTERNAL_MEM_TRACKING 来禁用怀疑此功能:
export OPENCV4NODEJS_DISABLE_EXTERNAL_MEM_TRACKING=1 // linux
set OPENCV4NODEJS_DISABLE_EXTERNAL_MEM_TRACKING=1 // windows
或者直接在您的代码中:
process.env.OPENCV4NODEJS_DISABLE_EXTERNAL_MEM_TRACKING = 1
const cv = require('opencv4nodejs')
Available Modules
API doc overview
opencv4nodejs

By its nature, JavaScript lacks the performance to implement Computer Vision tasks efficiently. Therefore this package brings the performance of the native OpenCV library to your Node.js application. This project targets OpenCV 3 and provides an asynchronous as well as an synchronous API.
The ultimate goal of this project is to provide a comprehensive collection of Node.js bindings to the API of OpenCV and the OpenCV-contrib modules. An overview of available bindings can be found in the API Documentation. Furthermore, contribution is highly appreciated. If you want to get involved you can have a look at the contribution guide.
- Examples
- How to install
- Usage with Docker
- Usage with Electron
- Usage with NW.js
- Quick Start
- Async API
- With TypeScript
- External Memory Tracking (v4.0.0)
- Available Modules
Examples
See examples for implementation.
Face Detection


Face Recognition with the OpenCV face module
Check out Node.js + OpenCV for Face Recognition.

Face Landmarks with the OpenCV face module
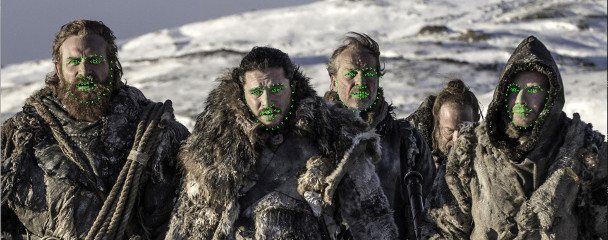
Face Recognition with face-recognition.js
Check out Node.js + face-recognition.js : Simple and Robust Face Recognition using Deep Learning.
Hand Gesture Recognition
Check out Simple Hand Gesture Recognition using OpenCV and JavaScript.

Object Recognition with Deep Neural Networks
Check out Node.js meets OpenCV’s Deep Neural Networks — Fun with Tensorflow and Caffe.
Tensorflow Inception


Single Shot Multibox Detector with COCO

Machine Learning
Check out Machine Learning with OpenCV and JavaScript: Recognizing Handwritten Letters using HOG and SVM.

Object Tracking

Feature Matching

Image Histogram

How to install
Important note: node-gyp won't handle whitespaces properly, thus make sure, that the path to your project directory does not contain any whitespaces. Installing opencv4nodejs under "C:\Program Files\some_dir" or similar will not work and will fail with: "fatal error C1083: Cannot open include file: 'opencv2/core.hpp'"!**
Requirements
- cmake (unless you are using a prebuilt OpenCV release)
On Windows
On windows you will need Windows Build Tools to compile OpenCV and opencv4nodejs. If you don't have Visual Studio or Windows Build Tools installed, you can easily install the VS2015 build tools:
npm install --global windows-build-tools
Auto build
If you do not want to set up OpenCV on your own you can simply let this package auto install OpenCV 3.4 + OpenCV contrib 3.4 (might take some time):
$ npm install --save opencv4nodejs
Manual build
Setting up OpenCV on your own will require you to set an environment variable: OPENCV4NODEJSDISABLEAUTOBUILD=1.
You can either install any of the OpenCV 3+ releases (note, this will come without contrib) or build OpenCV with or without OpenCV contrib from source on your own. On Linux and MacOSX the library should be installed under usr/local (which is the default).
On Windows
If you choose to set up OpenCV on your own you have to set the following environment variables before installing opencv4nodejs:
- OPENCVINCLUDEDIR pointing to the directory with the subfolders opencv and opencv2 containing the header files
- OPENCVLIBDIR pointing to the lib directory containing the OpenCV .lib files
Also you will need to add the OpenCV binaries to your system path:
- add an environment variable OPENCVBINDIR pointing to the binary directory containing the OpenCV .dll files
- append
;%OPENCV_BIN_DIR%;to your system path variable
Note: Restart your current console session after making changes to your environment.
If you are running into issues also check the requirements for node-gyp specific to your OS: https://github.com/nodejs/node-gyp.
Usage with Docker
opencv-express - example for opencv4nodejs with express.js and docker
Or simply pull from justadudewhohacks/opencv-nodejs for opencv-3.2 + contrib-3.2 with opencv4nodejs globally installed:
FROM justadudewhohacks/opencv-nodejs
Note: The aforementioned Docker image already has opencv4nodejs installed globally. In order to prevent build errors during an npm install, your package.json should not include opencv4nodejs, and instead should include/require the global package either by requiring it by absolute path or setting the NODE_PATH environment variable to /usr/lib/node_modules in your Dockerfile and requiring the package as you normally would.
Different OpenCV 3.x base images can be found here: https://hub.docker.com/r/justadudewhohacks/.
Usage with Electron
opencv-electron - example for opencv4nodejs with electron
Add the following script to your package.json:
"electron-rebuild": "electron-rebuild -w opencv4nodejs"
Run the script:
$ npm run electron-rebuild
Require it in the application:
const cv = require('opencv4nodejs');
Usage with NW.js
Any native modules, including opencv4nodejs, must be recompiled to be used with NW.js. Instructions on how to do this are available in the Use Native Modules section of the the NW.js documentation.
Once recompiled, the module can be installed and required as usual:
const cv = require('opencv4nodejs');
Quick Start
const cv = require('opencv4nodejs');
Initializing Mat (image matrix), Vec, Point
const rows = 100; // height
const cols = 100; // width

// empty Mat
const emptyMat = new cv.Mat(rows, cols, cv.CV_8UC3);

// fill the Mat with default value
const whiteMat = new cv.Mat(rows, cols, cv.CV_8UC1, 255);
const blueMat = new cv.Mat(rows, cols, cv.CV_8UC3, [255, 0, 0]);

// from array (3x3 Matrix, 3 channels)
const matData = [
  [[255, 0, 0], [255, 0, 0], [255, 0, 0]],
  [[0, 0, 0], [0, 0, 0], [0, 0, 0]],
  [[255, 0, 0], [255, 0, 0], [255, 0, 0]]
];
const matFromArray = new cv.Mat(matData, cv.CV_8UC3);

// from node buffer
const charData = [255, 0, ...];
const matFromArray = new cv.Mat(Buffer.from(charData), rows, cols, cv.CV_8UC3);

// Point
const pt2 = new cv.Point(100, 100);
const pt3 = new cv.Point(100, 100, 0.5);

// Vector
const vec2 = new cv.Vec(100, 100);
const vec3 = new cv.Vec(100, 100, 0.5);
const vec4 = new cv.Vec(100, 100, 0.5, 0.5);
Mat and Vec operations
const mat0 = new cv.Mat(...);
const mat1 = new cv.Mat(...);

// arithmetic operations for Mats and Vecs
const matMultipliedByScalar = mat0.mul(0.5);  // scalar multiplication
const matDividedByScalar = mat0.div(2);       // scalar division
const mat0PlusMat1 = mat0.add(mat1);          // addition
const mat0MinusMat1 = mat0.sub(mat1);         // subtraction
const mat0MulMat1 = mat0.hMul(mat1);          // elementwise multiplication
const mat0DivMat1 = mat0.hDiv(mat1);          // elementwise division

// logical operations Mat only
const mat0AndMat1 = mat0.and(mat1);
const mat0OrMat1 = mat0.or(mat1);
const mat0bwAndMat1 = mat0.bitwiseAnd(mat1);
const mat0bwOrMat1 = mat0.bitwiseOr(mat1);
const mat0bwXorMat1 = mat0.bitwiseXor(mat1);
const mat0bwNot = mat0.bitwiseNot();
Accessing Mat data
const matBGR = new cv.Mat(..., cv.CV_8UC3);
const matGray = new cv.Mat(..., cv.CV_8UC1);

// get pixel value as vector or number value
const vec3 = matBGR.at(200, 100);
const grayVal = matGray.at(200, 100);

// get raw pixel value as array
const [b, g, r] = matBGR.atRaw(200, 100);

// set single pixel values
matBGR.set(50, 50, [255, 0, 0]);
matBGR.set(50, 50, new Vec(255, 0, 0));
matGray.set(50, 50, 255);

// get a 25x25 sub region of the Mat at offset (50, 50)
const width = 25;
const height = 25;
const region = matBGR.getRegion(new cv.Rect(50, 50, width, height));

// get a node buffer with raw Mat data
const matAsBuffer = matBGR.getData();

// get entire Mat data as JS array
const matAsArray = matBGR.getDataAsArray();
IO
// load image from file
const mat = cv.imread('./path/img.jpg');
cv.imreadAsync('./path/img.jpg', (err, mat) => {
  ...
})

// save image
cv.imwrite('./path/img.png', mat);
cv.imwriteAsync('./path/img.jpg', mat,(err) => {
  ...
})

// show image
cv.imshow('a window name', mat);
cv.waitKey();

// load base64 encoded image
const base64text='data:image/png;base64,R0lGO..';//Base64 encoded string
const base64data =base64text.replace('data:image/jpeg;base64','')
                            .replace('data:image/png;base64','');//Strip image type prefix
const buffer = Buffer.from(base64data,'base64');
const image = cv.imdecode(buffer); //Image is now represented as Mat

// convert Mat to base64 encoded jpg image
const outBase64 =  cv.imencode('.jpg', croppedImage).toString('base64'); // Perform base64 encoding
const htmlImg='<img src=data:image/jpeg;base64,'+outBase64 + '>'; //Create insert into HTML compatible <img> tag

// open capture from webcam
const devicePort = 0;
const wCap = new cv.VideoCapture(devicePort);

// open video capture
const vCap = new cv.VideoCapture('./path/video.mp4');

// read frames from capture
const frame = vCap.read();
vCap.readAsync((err, frame) => {
  ...
});

// loop through the capture
const delay = 10;
let done = false;
while (!done) {
  let frame = vCap.read();
  // loop back to start on end of stream reached
  if (frame.empty) {
    vCap.reset();
    frame = vCap.read();
  }

  // ...

  const key = cv.waitKey(delay);
  done = key !== 255;
}
Useful Mat methods
const matBGR = new cv.Mat(..., cv.CV_8UC3);

// convert types
const matSignedInt = matBGR.convertTo(cv.CV_32SC3);
const matDoublePrecision = matBGR.convertTo(cv.CV_64FC3);

// convert color space
const matGray = matBGR.bgrToGray();
const matHSV = matBGR.cvtColor(cv.COLOR_BGR2HSV);
const matLab = matBGR.cvtColor(cv.COLOR_BGR2Lab);

// resize
const matHalfSize = matBGR.rescale(0.5);
const mat100x100 = matBGR.resize(100, 100);
const matMaxDimIs100 = matBGR.resizeToMax(100);

// extract channels and create Mat from channels
const [matB, matG, matR] = matBGR.splitChannels();
const matRGB = new cv.Mat([matR, matB, matG]);
Drawing a Mat into HTML Canvas
const img = ...

// convert your image to rgba color space
const matRGBA = img.channels === 1
  ? img.cvtColor(cv.COLOR_GRAY2RGBA)
  : img.cvtColor(cv.COLOR_BGR2RGBA);

// create new ImageData from raw mat data
const imgData = new ImageData(
  new Uint8ClampedArray(matRGBA.getData()),
  img.cols,
  img.rows
);

// set canvas dimensions
const canvas = document.getElementById('myCanvas');
canvas.height = img.rows;
canvas.width = img.cols;

// set image data
const ctx = canvas.getContext('2d');
ctx.putImageData(imgData, 0, 0);
Method Interface
OpenCV method interface from official docs or src:
void GaussianBlur(InputArray src, OutputArray dst, Size ksize, double sigmaX, double sigmaY = 0, int borderType = BORDER_DEFAULT);
translates to:
const src = new cv.Mat(...);
// invoke with required arguments
const dst0 = src.gaussianBlur(new cv.Size(5, 5), 1.2);
// with optional paramaters
const dst2 = src.gaussianBlur(new cv.Size(5, 5), 1.2, 0.8, cv.BORDER_REFLECT);
// or pass specific optional parameters
const optionalArgs = {
  borderType: cv.BORDER_CONSTANT
};
const dst2 = src.gaussianBlur(new cv.Size(5, 5), 1.2, optionalArgs);
Async API
The async API can be consumed by passing a callback as the last argument of the function call. By default, if an async method is called without passing a callback, the function call will yield a Promise.
Async Face Detection
const classifier = new cv.CascadeClassifier(cv.HAAR_FRONTALFACE_ALT2);

// by nesting callbacks
cv.imreadAsync('./faceimg.jpg', (err, img) => {
  if (err) { return console.error(err); }

  const grayImg = img.bgrToGray();
  classifier.detectMultiScaleAsync(grayImg, (err, res) => {
    if (err) { return console.error(err); }

    const { objects, numDetections } = res;
    ...
  });
});

// via Promise
cv.imreadAsync('./faceimg.jpg')
  .then(img =>
    img.bgrToGrayAsync()
      .then(grayImg => classifier.detectMultiScaleAsync(grayImg))
      .then((res) => {
        const { objects, numDetections } = res;
        ...
      })
  )
  .catch(err => console.error(err));

// using async await
try {
  const img = await cv.imreadAsync('./faceimg.jpg');
  const grayImg = await img.bgrToGrayAsync();
  const { objects, numDetections } = await classifier.detectMultiScaleAsync(grayImg);
  ...
} catch (err) {
  console.error(err);
}
With TypeScript
import * as cv from 'opencv4nodejs'
Check out the TypeScript examples.
External Memory Tracking (v4.0.0)
Since version 4.0.0 was released, external memory tracking has been enabled by default. Simply put, the memory allocated for Matrices (cv.Mat) will be manually reported to the node process. This solves the issue of inconsistent Garbage Collection, which could have resulted in spiking memory usage of the node process eventually leading to overflowing the RAM of your system, prior to version 4.0.0.
Note, that in doubt this feature can be disabled by setting an environment variable OPENCV4NODEJS_DISABLE_EXTERNAL_MEM_TRACKING before requiring the module:
export OPENCV4NODEJS_DISABLE_EXTERNAL_MEM_TRACKING=1 // linux
set OPENCV4NODEJS_DISABLE_EXTERNAL_MEM_TRACKING=1 // windows
Or directly in your code:
process.env.OPENCV4NODEJS_DISABLE_EXTERNAL_MEM_TRACKING = 1
const cv = require('opencv4nodejs')
Available Modules
API doc overview
你可能也喜欢
- @01js/cli 中文文档教程
- @0x/contracts-exchange-libs 中文文档教程
- @0x77/iqos.parser 中文文档教程
- @1o1w1/eslint-config-react-app 中文文档教程
- @352inc/react-bootstrap-table2-paginator 中文文档教程
- @44north/eslint-config 中文文档教程
- @64robots/vue-cli-plugin-vuex 中文文档教程
- @7-eleven/component-kits 中文文档教程
- @7span/shilp-vue 中文文档教程
- @accentor/api-client-js 中文文档教程


