@99xt/first-born 中文文档教程
first-born

Getting Started
这些说明将为您提供一份出于开发和测试目的,项目在本地机器上启动并运行
Prerequisites
此模块只能在 React Native 应用程序中使用。 要使用它,您需要一个安装了依赖项的 React Native 应用程序。 还需要将以下模块添加为开发依赖项。
create-react-classreact-native-vector-icons
Installing
要安装 first-born,请在终端中运行以下命令;
npm install --save @99xt/first-born
您还需要安装以下模块。
npm install --save create-react-class react-native-vector-icons
按照本指南为react-native-vector-icons配置你的项目。
不需要其他步骤为每个平台(Android/iOS)单独配置first-born。
Development Testing
要测试 repo,首先克隆它;
git clone https://github.com/99xt/first-born.git
移入文件夹;
cd first-born
安装依赖;
npm install
并运行测试脚本;
npm run test
Usage
像这样导入组件;
import { Button } from "@99xt/first-born";
Utils
Colors
| Color | Android | iOS |
|---|---|---|
| white | #FFF | #FFF |
| black | #000 | #000 |
| primary | #486c86 | #486c86 |
| secondary | #8dd9d5 | #8dd9d5 |
| error | #e74c3c | #e74c3c |
| inputGrey | rgba(33, 33, 33, 0.5) | rgba(33, 33, 33, 0.5) |
| darkGrey | rgba(33, 33, 33, 0.87) | rgba(33, 33, 33, 0.87) |
| lightGrey | rgba(33, 33, 33, 0.4) | rgba(33, 33, 33, 0.4) |
| overlay | rgba(68, 68, 68, 0.6) | rgba(68, 68, 68, 0.6) |
| secondaryBackground | rgba(125, 167, 217, 0.2) | #ecf8fa |
Atoms
Text
<Text>Hello</Text>
Android
iOS
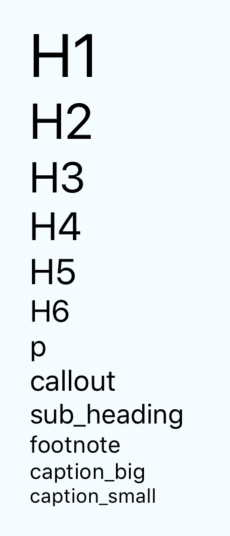
您可以使用任何 文本属性 和以下内容:
| Prop | Description | Default |
|---|---|---|
size | Size of the text, picked from predefined sizes, according to underlying platform. | 'p' |
bold | If text is bold or not. | false |
color | Color of the text. | black |
margin | If the text requires a margin or not. | false |
align | Alignment of text ('left', 'right', 'center') | 'left' |
| Size | Android | iOS |
|---|---|---|
| h1 | 96 | 34 |
| h2 | 60 | 28 |
| h3 | 48 | 24 |
| h4 | 34 | 22 |
| h5 | 24 | 20 |
| h6 | 20 | 17 |
| p | 16 | 16 |
| callout | 15 | 16 |
| sub_heading | 14 | 15 |
| footnote | 13 | 13 |
| caption_big | 12 | 12 |
| caption_small | 11 | 11 |
Icon
react-native-vector 中的所有图标组件(所有字体样式) -icons 被使用。
<Icon name='heart'/>
Android
iOS

您可以使用任何 TouchableOpacity 属性 和以下内容:
| Prop | Description | Default |
|---|---|---|
size | Size of the icon. | 18 |
name | Similar to the name attribute in react-native-vector-icons. Does not require the prefix md or ios for Ionicons. | None |
color | Color of the icon. | white |
type | Type of the icon font style. ('zocial', 'octicon', 'material', 'material-community', 'ionicon', 'foundation', 'evilicon', 'entypo', 'font-awesome', 'simple-line-icon', 'feather', 'antdesign') | white |
Badge
仅接受 Text 和 Icon 原子和 react-native Image 。
<Badge>
    <Text>+1</Text>
</Badge>
<Badge color="red">
    <Icon name="heart" />
</Badge>
Android

iOS

您可以使用任何 View 属性 和以下内容:
| Prop | Description | Default |
|---|---|---|
color | Color of the badge. | primary |
outline | If the badge has the outline style. | false |
Thumbnail
显示方形或圆形图像的图像组件。
<Thumbnail source={require("path/to/image.png")}/>
您可以使用任何 Image 属性 和以下内容:
| Prop | Description | Default |
|---|---|---|
size | Size of the image. ('small', 'medium', 'large', 'exlarge') | 'medium' |
customSize | Size of the image, if it does not fit the above defined sizes. | None |
rounded | If the image is to be a circle. | false |
onEdit | Props to handle an image change of the thumbnail. You can use all Button atom properties. | None |
Button
只接受 Text和 Icon 原子和 react-native Image 。
<Button onPress={this.handleButtonClick} block >
    <Text>Click Me</Text>
</Button>
Android
iOS
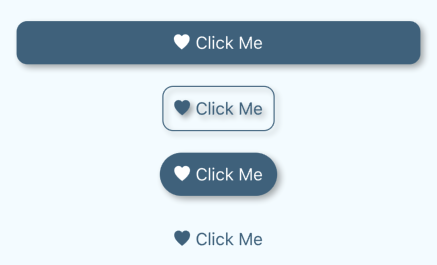
您可以使用任何 TouchableOpacity 属性 和以下内容:
| Prop | Description | Default |
|---|---|---|
size | Size of the button, picked from predefined sizes small, default and large. | 'default' |
color | Color of the button. | primary |
rounded | If the button has rounded corners. | false |
block | If the button has full width. | false |
ouline | If the button is transparent, but with a colored border and children. | false |
rounded | If the button is transparent, but with colored children. | false |
DatePicker
呈现一个 Text,当onPress 方法被触发。
<DatePicker onDateChange={this.handleDateChange} />
Android
iOS
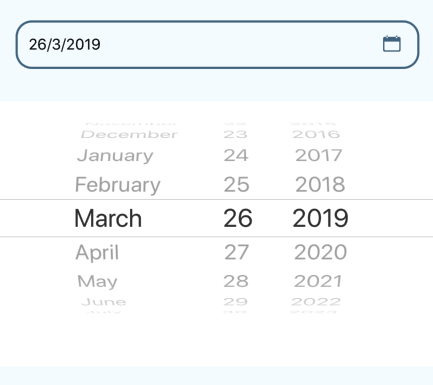
你可以使用任何TextInput 属性 和以下内容:
| Prop | Description | Default |
|---|---|---|
placeholder | Display this string if value not selected yet. iOS only. | 'Select Date' |
formatChosenDate | User defined function that returns a formatted date. | None |
onDateChange | User defined function to run when selected date changes. | None |
defaultDate | Initially picked date. | None |
minimumDate | Minimum in date range. | None |
maximumDate | Maximum in date range. | None |
modalTransparent | If DatePicker modal is transparent. iOS only. | true |
animationType | Type of entry/exit animation for DatePicker modal. iOS only. | 'fade' |
locale | Locale of DatePicker. iOS only. | None |
mode | Type of picker ('date', 'time'). | 'date' |
color | Color of the TextInput when in focus. | primary |
isValid | User defined validation function, that returns true for valid input | None |
errorMessage | Error message to display below input, if validation fails | None |
rounded | If DatePicker style is rounded edges. | false |
underline | If DatePicker style is an underline. | false |
defaultStyle | If DatePicker style is default as seen above. | true |
noStyle | If DatePicker has no framework defined style. | false |
style | Custom DatePicker inactive style. (Style object) | None |
activeStyle | Custom DatePicker active style. (Style object) | None |
errorStyle | Custom DatePicker error style. (Style object) | None |
errorColor | Color of DatePicker when validation fails | error |
Input
<Input onChangeText={this.handleTextChange} placeholder="Name" />
Android
iOS

您可以使用任何 TextInput 属性 和以下内容:
| Prop | Description | Default |
|---|---|---|
color | Color of the TextInput when in focus. | primary |
isValid | User defined validation function, that returns true for valid text | None |
errorMessage | Error message to display below input, if validation fails | None |
rounded | If Input style is rounded edges. | false |
underline | If Input style is an underline. | false |
defaultStyle | If Input style is default as seen above. | true |
noStyle | If Input has no framework defined style. | false |
style | Custom Input inactive style. (Style object) | None |
activeStyle | Custom Input active style. (Style object) | None |
errorStyle | Custom Input error style. (Style object) | None |
errorColor | Color of Input when validation fails | error |
iconLeft | Icon Atom to render on the left of the Input | None |
iconRight | Icon Atom to render on the right of the Input | None |
Picker
在 Android 中,显示下拉选择器。 在 iOS 中,呈现一个 Text,它在 onPress 方法被触发时显示一个选择器模式。
<Picker onValueChange={this.handleValueChange} selectedValue={this.state.pickerValue}>
    <Picker.Item value="1" label="1" />
    <Picker.Item value="2" label="2" />
    <Picker.Item value="3" label="3" />
</Picker>
Android
iOS
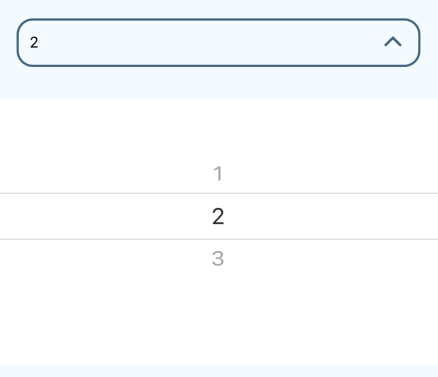
您可以使用任何 Picker 属性 和以下内容:
| Prop | Description | Default |
|---|---|---|
placeholder | Display this string if value not selected yet. iOS only. | 'Select Option' |
modalTransparent | If Picker modal is transparent. iOS only. | true |
animationType | Type of entry/exit animation for Picker modal. iOS only. | 'fade' |
mode | Type of picker mode ('dialog', 'dropdown'). Android only. | 'dropdown' |
color | Color of the TextInput when in focus. | primary |
isValid | User defined validation function, that returns true for valid input | None |
errorMessage | Error message to display below input, if validation fails | None |
rounded | If Picker style is rounded edges. | false |
underline | If Picker style is an underline. | false |
defaultStyle | If Picker style is default as seen above. | true |
noStyle | If Picker has no framework defined style. | false |
style | Custom Picker inactive style. (Style object) | None |
activeStyle | Custom Picker active style. (Style object) | None |
errorStyle | Custom Picker error style. (Style object) | None |
errorColor | Color of Picker when validation fails | error |
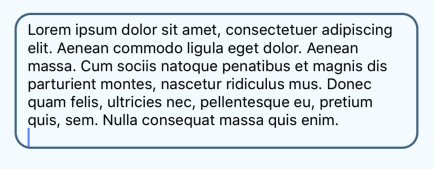
TextArea
呈现一个 TextInput,高度随高度增加输入的文本。
<TextArea onChangeText={this.handleTextChange} placeholder="Description" />
Android
iOS
您可以使用任何 TextInput 属性 和以下内容:
| Prop | Description | Default |
|---|---|---|
color | Color of the TextInput when in focus. | primary |
isValid | User defined validation function, that returns true for valid text | None |
errorMessage | Error message to display below input, if validation fails | None |
underline | If TextArea style is an underline. | false |
defaultStyle | If TextArea style is default as seen above. | true |
noStyle | If TextArea has no framework defined style. | false |
style | Custom TextArea inactive style. (Style object) | None |
activeStyle | Custom TextArea active style. (Style object) | None |
errorStyle | Custom TextArea error style. (Style object) | None |
errorColor | Color of TextArea when validation fails | error |
Molecules
Form Elements
FormDatePicker
使用 Atom DatePicker。
<FormDatePicker onDateChange={this.handleDateChange} label="Date" />
Android
iOS

附加道具;
| Prop | Description | Default |
|---|---|---|
label | Label to display name of input. (Required) | None |
FormInput
使用 Atom Input。
<FormInput onChangeText={this.handleTextChange} label="Name" />
Android
iOS

附加道具;
| Prop | Description | Default |
|---|---|---|
label | Label to display name of input. (Required) | None |
FormPicker
使用 Atom Picker。
<FormPicker onValueChange={this.handleValueChange} selectedValue={pickerValue} label="Number" data={pickerData} />
Android
iOS

附加道具;
| Prop | Description | Default |
|---|---|---|
label | Label to display name of input. (Required) | None |
data | An array containing objects with values and labels for each Picker.Item. | None |
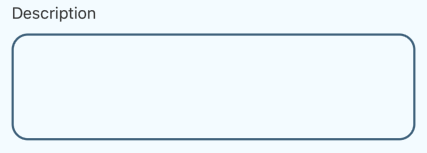
FormTextArea
使用 Atom TextArea。
<FormTextArea onChangeText={this.handleTextChange} label="Description" />
Android
iOS
附加道具;
| Prop | Description | Default |
|---|---|---|
label | Label to display name of input. (Required) | None |
Simple Notifications
<Notification ref={"alert"} />
要使用通知组件并向其传递数据,您需要在 componentDidMount 中注册一个通知管理器,并在 componentWillUnmount 中注销它。
componentDidMount() {
    NotificationBarManager.registerMessageBar(this.refs.alert);
}

componentWillUnmount() {
    NotificationBarManager.unregisterMessageBar();
}
要触发通知显示,您需要运行通知管理器方法 showAlert。
handleShowNotification = () => {
    NotificationBarManager.showAlert({
        message: 'Your alert message goes here', // required
        icon: { name: "alert" },
        // image: { source: require("./assets/images/accessibility.png") }, // image prop
    });
}
Android
iOS

可以传递给通知是;
| Prop | Description | Default |
|---|---|---|
message | Message to display. (Required) | None |
shouldHideAfterDelay | If notification should hide after display or keep being shown. | true |
durationToHide | Animation duration for the notification to completely hide. | 350 |
durationToShow | Animation duration for the notification to completely show. | 350 |
duration | Duration of time to display the alert | 3000 |
image | Image to be displayed next to notification message | None |
icon | Icon to be displayed next to notification message | 'alert' |
color | Background color of the Notification body. | '#007bff' |
textColor | Color of the Notification text. | white |
fontSize | Font size of Notification text. Accepts text identifier of above Text atom, or specific number. | 'sub_heading' |
fontWeight | Font weight of the Notification text. | 'bold' |
SnackBars
<SnackBar ref={"alert"} />
要使用 SnackBar 组件并将数据传递给它,您需要在 componentDidMount 中注册一个 SnackBar 管理器,并在 componentWillUnmount 中注销它。
componentDidMount() {
    SnackManager.registerMessageBar(this.refs.alert);
}

componentWillUnmount() {
    SnackManager.unregisterMessageBar();
}
要触发 SnackBar 显示,您需要运行 SnackBar 管理器方法 showAlert。
handleShowSnackBar = () => {
    SnackManager.showAlert({
        message: 'Your alert message goes here' // required
    });
}
Android

iOS

可以传递给SnackBar 是;
| Prop | Description | Default |
|---|---|---|
message | Message to display. (Required) | None |
shouldHideAfterDelay | If SnackBar should hide after display or keep being shown. | true |
durationToHide | Animation duration for the SnackBar to completely hide. | 350 |
durationToShow | Animation duration for the SnackBar to completely show. | 350 |
duration | Duration of time to display the alert | 3000 |
backgroundColor | Background color of the SnackBar body. | '#333333' |
onClickDismiss | If SnackBar should hide after clicking the action button. | true |
position | Position of SnackBar notification ('bottom', 'top'). | 'bottom' |
action | An object denoting the method to run when the snack alerts button is clicked . | see below |
要传递给 SnackBar 的 action prop 的数据;
| Prop | Description | Default |
|---|---|---|
title | Title of the button | 'Close' |
onPress | Method to run when the button is clicked. | internal method to hide alert |
color | Button's text color | error |
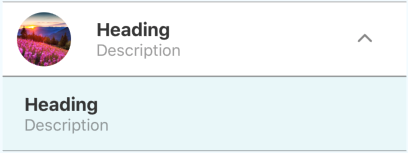
ListItem
显示标题(必需)、描述和图像的列表项。 这个分子利用了 Text 原子。
<ListItem title="Heading" description="Description" image={{ source: require("path/to/image.png")}} >
    <ListItem title="Heading" onPress={this.handleButtonClick} description="Description" /> //Nested List Item
</ListItem>
Android
iOS
您可以使用任何 TouchableOpacity 属性 和以下内容:
| Prop | Description | Default |
|---|---|---|
title | Description of List Item. (Required) | None |
description | Description of List Item. | None |
image | Image to display in List Item. You can use all react-native Image properties. | None |
block | If the List Item has full width of the device. | false |
backgroundColor | Background color of List Item. | white |
secondary | If the List Item is nested inside another. | false |
rounded | If the image displayed on the ListItem is rouned or not. | false |
ThinListItem
显示标题(必需)、描述和图像的列表项。 这个分子利用了 Text 原子。 与上述分子类似,但更小并增加了一些功能
<ThinListItem title="Heading" description="Description" image={{ source: require("path/to/image.png") }} />
您可以使用任何 TouchableOpacity 属性 和以下:
| Prop | Description | Default |
|---|---|---|
title | Description of List Item. (Required) | None |
description | Description of List Item. | None |
image | Image to display in List Item. You can use all react-native Image properties. | None |
icon | Icon to display in List Item. You can use all Icon properties. | None |
arrow | If the List Item has an arrow at the right of the item. | false |
backgroundColor | Background color of List Item. | white |
rounded | If the image displayed on the ListItem is rouned or not. | false |
Floating Action Button
该分子使用Text 和Icon 原子。
One action
<FloatingButton onPress={this.handleAction} image={require("path/to/image.png")} />
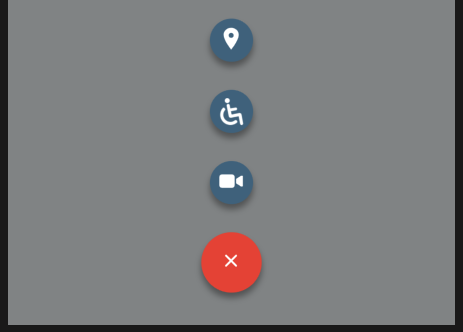
Multiple actions
actions = [
    { text: 'Accessibility', image: require("path/to/image.png"), name: 'bt_accessibility', position: 2, onPress: () => this.handleAccessibility() },
    { text: 'Location', icon: "pin", name: 'bt_room', position: 1, onPress: () => this.handleLocation() },
    { text: 'Video', icon: "videocam", name: 'bt_videocam', position: 3, onPress: () => this.handleVideo() }
];

<FloatingButton actions={actions} />
Android
iOS


主要FloatingButton 是;
| Prop | Description | Default |
|---|---|---|
| color | Background color of main button. | primary |
| distanceToEdge | Distance from edge of device for FAB positioning. | 30 |
| mainVerticalDistance | Distance of FAB from the bottom of the screen | 0 |
| visible | If the FAB and its children are visible. | true |
| overlayColor | The overlay color of the background. | overlay |
| position | The position of the FAB (center, right). | 'right' |
| showBackground | Show background behind the FAB. | true |
| openOnMount | If FAB should be expanded when page mounts. | false |
| actionsPaddingTopBottom | Spacing between child action items. | 8 |
| iconHeight | Height of button icon. | 15 |
| iconWidth | Width of button icon. | 15 |
| listenKeyboard | If listeners are to be added for the Keyboard component. | false |
| dismissKeyboardOnPress | If keyboard should be dismissed on button click. | false |
| onPress | User defined action to run when FAB main button is clicked. | None |
| onClose | User defined action to run when FAB is closed. | None |
| onOpen | User defined action to run when FAB is expanded. | None |
| onPressBackdrop | User defined action to run when the background of the expanded FAB is clicked. | None |
| onStateChange | User defined action to run when the component state changes | None |
| image | Image to display on FAB main button. | None |
| iconName | Icon to display on FAB main button. | None |
| tabs | If the page also includes a footer navigation | false |
| action | Array of objects which correlate to a FloatingButtonItem | false |
通过 actions 道具发送的嵌套 FloatingButtonItems 的道具是;
| Prop | Description | Default |
|---|---|---|
| color | Background color of main button. | primary |
| image | Image to display on FAB main button. | None |
| icon | Icon to display on FAB main button. | None |
| name | Unique name for each button. (Required) | None |
| textContainerStyle | Style of text container | None |
| text | Text to be displayed next to button. | None |
| textStyle | Style of text. | None |
| textProps | Other text props. | 'right' |
| textBackground | Background color of text. | white |
| textColor | Font color of text. | darkGrey |
| textElevation | Shadow of text element. | 5 |
| position | The position of the FAB (center, right). | None |
| active | If FAB is expanded or not. | None |
| distanceToEdge | Distance from edge of device for FAB positioning. | 30 |
| paddingTopBottom | Vertical padding of each action item. | None |
| onPress | User defined action to run when FAB child action button is clicked. | None |
| margin | Padding right of each action item, if the position of FAB is 'right' | 8 |
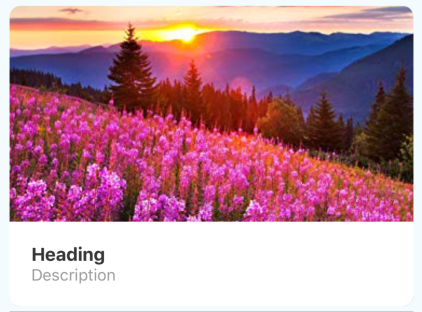
Card
显示标题(必需)、说明和图像的卡片。
<Card title="Heading" description="Description" image={{ source: require("path/to/image.png")}} />
Android
iOS
您可以使用任何 TouchableOpacity 属性 和以下内容:
| Prop | Description | Default |
|---|---|---|
title | Description of Card. (Required) | None |
description | Description of Card. | None |
image | Image to display in Card. You can use all react-native Image properties. | None |
block | If the Card has full width of the device. | false |
backgroundColor | Background color of Card. | white |
Organisms
Form
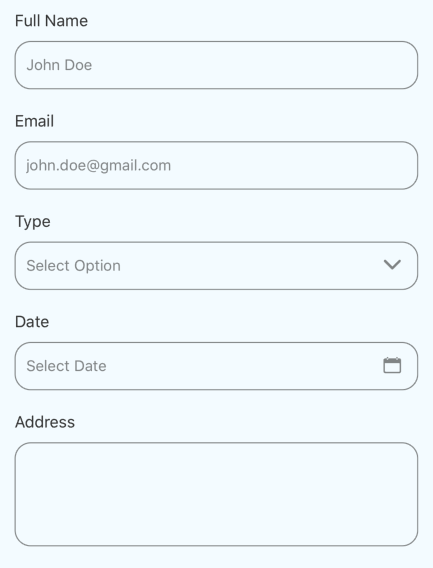
formElements = [
    { label: "Full Name", type: "text", onChangeText: (value) => this.handleTextChange(value), placeholder: "John Doe" },
    { label: "Email", type: "text", onChangeText: (value) => this.handleTextChange(value), placeholder: "john.doe@gmail.com", isValid: (value) => this.checkInputValidity(value) },
    { label: "Type", type: "picker", onValueChange: (value) => this.handleValueChange(value), pickerData: this.pickerData },
    { label: "Date", type: "date", onDateChange: (value) => this.handleDateChange(value) },
    { label: "Address", type: "textarea", onChangeText: (value) => this.handleTextChange(value) },
];

<Form formElements={formElements} />
Android
iOS

Form 组件遍历 formElements 数组,渲染根据每个对象中指定的输入类型的字段。 表单对象只有一个额外的道具;
| Prop | Description | Default |
|---|---|---|
color | Color of all form elements when in focus. | primary |
rounded | If form element style is rounded edges. | false |
underline | If form element style is an underline. | false |
defaultStyle | If form element style is default as seen above. | true |
noStyle | If form element has no framework defined style. | false |
style | Custom form element inactive style. (Style object) | None |
activeStyle | Custom form element active style. (Style object) | None |
errorStyle | Custom form element error style. (Style object) | None |
但是每种类型的输入都有对应于下面命名的分子的 proptypes;
| Type | Molecule Component |
|---|---|
'text' | FormInput |
'textarea' | FormTextArea |
'date' | FormDatePicker |
'picker' | FormPicker |
ListView
ListItem 分子的垂直列表
listData = [
    { title: "Heading 1", description: "Description 1", image: { source: require("path/to/image.png")} },
    { title: "Heading 2", description: "Description 2", image: { source: require("path/to/image.png")} },
    { title: "Heading 3", description: "Description 3", image: { source: require("path/to/image.png")} }
];

<ListView data={listData} />
您还可以将自定义 renderItem 方法传递给 ListView,以使用其他 TouchableOpacityListItems code> 道具,例如 onPress;
handleListItemClick = (title, description) => {
    Alert.alert(title, description);
}

<ListView data={listData} renderItem={({item}) => <ListItem {...item} onPress={() => handleListItemClick(item.title, item.description)} />} />
Android
iOS
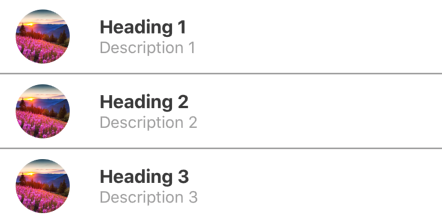
您可以使用任何 FlatList 属性 和以下内容:
| Prop | Description | Default |
|---|---|---|
backgroundColor | Background color of all cards. | white |
thin | If the 'ThinListItem' is the component to be rendered. | false |
rounded | If the image displayed on the ListItem is rouned or not. | false |
要发送到 ListView 的数据需要包含与 props 相同的字段ListItem 组件。
CardList
卡片分子的垂直/水平列表。
listData = [
    { title: "Heading 1", description: "Description 1", image: { source: require("path/to/image.png")} },
    { title: "Heading 2", description: "Description 2", image: { source: require("path/to/image.png")} },
    { title: "Heading 3", description: "Description 3", image: { source: require("path/to/image.png")} }
];

<CardList data={listData} />
您还可以将自定义 renderItem 方法传递给 CardList,以使用其他 TouchableOpacity 道具呈现 Cards,例如 <代码>按下;
handleListItemClick = (title, description) => {
    Alert.alert(title, description);
}

<CardList data={listData} renderItem={({item}) => <Card {...item} onPress={() => handleListItemClick(item.title, item.description)} />} />
Android
iOS
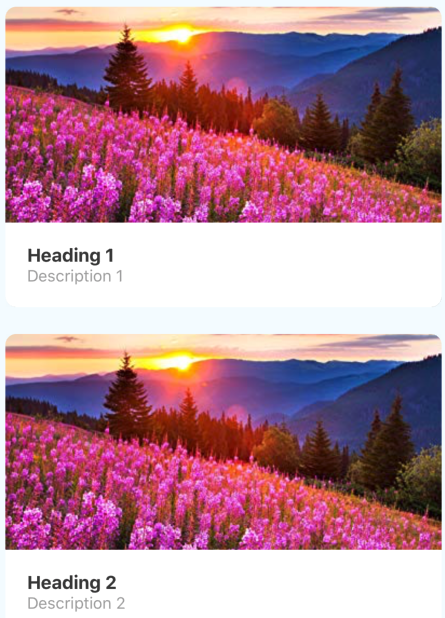
您可以使用任何 FlatList 属性 和以下内容:
| Prop | Description | Default |
|---|---|---|
backgroundColor | Background color of all cards. | white |
要发送到 CardList 的数据需要包含与 props 相同的字段卡片 组件。
NavBar
导航标头使用 Text 和 Icon 原子。
<NavBar>
    <NavBarLeft>
        <NavBarButton type="drawer" />
    </NavBarLeft>
    <NavBarBody>
        <Text>Title</Text>
    </NavBarBody>
    <NavBarRight>
        <NavBarButton onPress={this.handleFavourites} >
            <Icon name="heart" />
        </NavBarButton>
    </NavBarRight>
</NavBar>
Android
iOS

NavBar 是标头的主要容器。 它使用 View 属性 和以下内容:
| Prop | Description | Default |
|---|---|---|
transparent | If status bar above header is transparent | None |
statusBarColor | Background color of the NavBar. | primary for Android, '#F8F8F8' for iOS |
statusBarColor | Content type of the StatusBar.('light-content', 'dark-content') | 'light-content' for Android, 'dark-content' for iOS |
NavBarBody 是在页眉中心显示其子项的容器。 它只接受文本标签内的页面标题。 它使用 View 属性 和以下内容:
| Prop | Description | Default |
|---|---|---|
color | Color of the titleText. | white for Android, black for iOS |
NavBarLeft 显示它的子项在左侧,而 NavBarRight 则在标题的右侧显示其子项。 所有标头必须包含这三个标签,以统一呈现。
NavBarButton 是要在 NavBar 中使用的按钮元素。 它只接受原子 Text、Icon 和 react-native Image。 它包含与 TouchableOpacity 相同的属性。 它还带有用于常用功能的内置类型,这些功能是 'drawer'、'back' 和 'search'。
| Prop | Description | Default |
|---|---|---|
type | Built in UI implementation of common NavBar button (drawer, back, search) | None |
color | Text and Icon color of button. | white for Android, '#0a60ff' for iOS |
TabBar
导航页脚使用 Text 和 Icon 原子。
<TabBar>
    <TabItem active>
        <Icon name="heart" />
        <Text>Favorites</Text>
    </TabItem>
    <TabItem>
        <Icon name="add" />
        <Text>Add New</Text>
    </TabItem>
    <TabItem>
        <Icon name="camera" />
        <Text>Camera</Text>
    </TabItem>
    <TabItem>
        <Icon name="settings" />
        <Text>Settings</Text>
    </TabItem>
</TabBar>
Android
iOS

TabBar 是页脚导航的主要容器。 它使用 View 属性 和以下内容:
| Prop | Description | Default |
|---|---|---|
color | Background color of the TabBar. | primary for Android, '#F8F8F8' for iOS |
activeColor | Text and Icon color of active tab. | white for Android, '#0a60ff' for iOS |
inactiveColor | Text and Icon color of inactive tab. | 'rgba(209, 216, 224, 0.8)' for Android, '#8e8e93' for iOS |
top | If the TabBar is on top of the page. Android only. | false |
TabItem 是要在 TabBar 中使用的按钮元素。 它只接受原子 Text、Icon 和 react-native Image。 它包含与 TouchableOpacity 相同的属性。 此外,它还包含以下属性;
| Prop | Description | Default |
|---|---|---|
activeColor | Text and Icon color of active tab. | white for Android, '#0a60ff' for iOS |
inactiveColor | Text and Icon color of inactive tab. | 'rgba(209, 216, 224, 0.8)' for Android, '#8e8e93' for iOS |
active | If current TabItem is active. | false |
PillBar
药丸导航栏。
pillScenes = [
    { scene: <Home /> },
    { scene: <CardList data={listData} /> },
    { scene: <ListView data={listData} /> },
    { scene: <View style={styles.innerContainer}><Form formElements={formElements} /></View> },
];

pillHeaders = [
    { title: 'Home', icon: "home" },
    { title: 'Card List', icon: "card" },
    { title: 'List View', icon: "list" },
    { title: 'Form', icon: "help" }
];

<PillView pillHeaders={pillHeaders} pillScenes={pillScenes} />
Android
iOS

的索引pillHeader 对象,将用于在转换期间查询相应的 pillScene。
PillBar 是药丸导航的主要容器。 它使用 View 属性 和以下内容:
| Prop | Description | Default |
|---|---|---|
color | Active color of the PillBar. Android only. | primary for Android, '#0a60ff' for iOS |
此属性 color, 将传递给子元素 PillItem 作为下面提到的 activeColor 道具
PillItem 是要在 中使用的按钮元素药丸条。 它只接受原子 Text、Icon 和 react-native Image。 它包含与 TouchableOpacity 相同的属性。 此外,它还包含以下属性;
| Prop | Description | Default |
|---|---|---|
activeColor | Text and Icon color of active tab. | white for Android, '#0a60ff' for iOS |
inactiveColor | Text and Icon color of inactive tab. Android only. | '#adadad' |
active | If current PillItem is active. | false |
Contributing
请阅读 CONTRIBUTING.md 了解我们的行为准则和提交流程的详细信息向我们提出请求。
Versioning
我们使用 SemVer 进行版本控制。
Authors
- Sameeha Rahman - Initial work - samsam-026
- Muditha Batagoda - Initial Design - mudithabatagoda
另请参阅参与此项目的贡献者列表。
License
该项目已获得 MIT 许可 - 请参阅 LICENSE.md 文件了解详细信息
first-born

Getting Started
These instructions will get you a copy of the project up and running on your local machine for development and testing purposes
Prerequisites
This module can only be used in a React Native app. To use it, you will need a React Native app with it's dependencies installed. The following modules need to be added as a dev dependency as well.
create-react-classreact-native-vector-icons
Installing
To install first-born run the following command in the terminal;
npm install --save @99xt/first-born
You will additionally require to install the following modules as well.
npm install --save create-react-class react-native-vector-icons
Follow this guide to configure react-native-vector-icons for your project.
No other steps are required to configure first-born separately for each platform (Android/iOS).
Development Testing
To test the repo, first clone it;
git clone https://github.com/99xt/first-born.git
Move into the folder;
cd first-born
Install dependencies;
npm install
And run the test script;
npm run test
Usage
Import components like this;
import { Button } from "@99xt/first-born";
Utils
Colors
| Color | Android | iOS |
|---|---|---|
| white | #FFF | #FFF |
| black | #000 | #000 |
| primary | #486c86 | #486c86 |
| secondary | #8dd9d5 | #8dd9d5 |
| error | #e74c3c | #e74c3c |
| inputGrey | rgba(33, 33, 33, 0.5) | rgba(33, 33, 33, 0.5) |
| darkGrey | rgba(33, 33, 33, 0.87) | rgba(33, 33, 33, 0.87) |
| lightGrey | rgba(33, 33, 33, 0.4) | rgba(33, 33, 33, 0.4) |
| overlay | rgba(68, 68, 68, 0.6) | rgba(68, 68, 68, 0.6) |
| secondaryBackground | rgba(125, 167, 217, 0.2) | #ecf8fa |
Atoms
Text
<Text>Hello</Text>
Android
iOS

You can use any Text property and the following:
| Prop | Description | Default |
|---|---|---|
size | Size of the text, picked from predefined sizes, according to underlying platform. | 'p' |
bold | If text is bold or not. | false |
color | Color of the text. | black |
margin | If the text requires a margin or not. | false |
align | Alignment of text ('left', 'right', 'center') | 'left' |
| Size | Android | iOS |
|---|---|---|
| h1 | 96 | 34 |
| h2 | 60 | 28 |
| h3 | 48 | 24 |
| h4 | 34 | 22 |
| h5 | 24 | 20 |
| h6 | 20 | 17 |
| p | 16 | 16 |
| callout | 15 | 16 |
| sub_heading | 14 | 15 |
| footnote | 13 | 13 |
| caption_big | 12 | 12 |
| caption_small | 11 | 11 |
Icon
The All Icon components (all font styles) from react-native-vector-icons is used.
<Icon name='heart'/>
Android
iOS

You can use any TouchableOpacity property and the following:
| Prop | Description | Default |
|---|---|---|
size | Size of the icon. | 18 |
name | Similar to the name attribute in react-native-vector-icons. Does not require the prefix md or ios for Ionicons. | None |
color | Color of the icon. | white |
type | Type of the icon font style. ('zocial', 'octicon', 'material', 'material-community', 'ionicon', 'foundation', 'evilicon', 'entypo', 'font-awesome', 'simple-line-icon', 'feather', 'antdesign') | white |
Badge
Only accepts Text and Icon atoms and react-native Image .
<Badge>
    <Text>+1</Text>
</Badge>
<Badge color="red">
    <Icon name="heart" />
</Badge>
Android

iOS

You can use any View property and the following:
| Prop | Description | Default |
|---|---|---|
color | Color of the badge. | primary |
outline | If the badge has the outline style. | false |
Thumbnail
An Image component that displays either a square or circular image.
<Thumbnail source={require("path/to/image.png")}/>
You can use any Image property and the following:
| Prop | Description | Default |
|---|---|---|
size | Size of the image. ('small', 'medium', 'large', 'exlarge') | 'medium' |
customSize | Size of the image, if it does not fit the above defined sizes. | None |
rounded | If the image is to be a circle. | false |
onEdit | Props to handle an image change of the thumbnail. You can use all Button atom properties. | None |
Button
Only accepts Text and Icon atoms and react-native Image .
<Button onPress={this.handleButtonClick} block >
    <Text>Click Me</Text>
</Button>
Android
iOS

You can use any TouchableOpacity property and the following:
| Prop | Description | Default |
|---|---|---|
size | Size of the button, picked from predefined sizes small, default and large. | 'default' |
color | Color of the button. | primary |
rounded | If the button has rounded corners. | false |
block | If the button has full width. | false |
ouline | If the button is transparent, but with a colored border and children. | false |
rounded | If the button is transparent, but with colored children. | false |
DatePicker
Renders a Text, that displays a date picker modal when the onPress method is triggered.
<DatePicker onDateChange={this.handleDateChange} />
Android
iOS

You can use any TextInput property and the following:
| Prop | Description | Default |
|---|---|---|
placeholder | Display this string if value not selected yet. iOS only. | 'Select Date' |
formatChosenDate | User defined function that returns a formatted date. | None |
onDateChange | User defined function to run when selected date changes. | None |
defaultDate | Initially picked date. | None |
minimumDate | Minimum in date range. | None |
maximumDate | Maximum in date range. | None |
modalTransparent | If DatePicker modal is transparent. iOS only. | true |
animationType | Type of entry/exit animation for DatePicker modal. iOS only. | 'fade' |
locale | Locale of DatePicker. iOS only. | None |
mode | Type of picker ('date', 'time'). | 'date' |
color | Color of the TextInput when in focus. | primary |
isValid | User defined validation function, that returns true for valid input | None |
errorMessage | Error message to display below input, if validation fails | None |
rounded | If DatePicker style is rounded edges. | false |
underline | If DatePicker style is an underline. | false |
defaultStyle | If DatePicker style is default as seen above. | true |
noStyle | If DatePicker has no framework defined style. | false |
style | Custom DatePicker inactive style. (Style object) | None |
activeStyle | Custom DatePicker active style. (Style object) | None |
errorStyle | Custom DatePicker error style. (Style object) | None |
errorColor | Color of DatePicker when validation fails | error |
Input
<Input onChangeText={this.handleTextChange} placeholder="Name" />
Android
iOS

You can use any TextInput property and the following:
| Prop | Description | Default |
|---|---|---|
color | Color of the TextInput when in focus. | primary |
isValid | User defined validation function, that returns true for valid text | None |
errorMessage | Error message to display below input, if validation fails | None |
rounded | If Input style is rounded edges. | false |
underline | If Input style is an underline. | false |
defaultStyle | If Input style is default as seen above. | true |
noStyle | If Input has no framework defined style. | false |
style | Custom Input inactive style. (Style object) | None |
activeStyle | Custom Input active style. (Style object) | None |
errorStyle | Custom Input error style. (Style object) | None |
errorColor | Color of Input when validation fails | error |
iconLeft | Icon Atom to render on the left of the Input | None |
iconRight | Icon Atom to render on the right of the Input | None |
Picker
In Android, display a dropdown picker. In iOS, renders a Text, that displays a picker modal when the onPress method is triggered.
<Picker onValueChange={this.handleValueChange} selectedValue={this.state.pickerValue}>
    <Picker.Item value="1" label="1" />
    <Picker.Item value="2" label="2" />
    <Picker.Item value="3" label="3" />
</Picker>
Android
iOS

You can use any Picker property and the following:
| Prop | Description | Default |
|---|---|---|
placeholder | Display this string if value not selected yet. iOS only. | 'Select Option' |
modalTransparent | If Picker modal is transparent. iOS only. | true |
animationType | Type of entry/exit animation for Picker modal. iOS only. | 'fade' |
mode | Type of picker mode ('dialog', 'dropdown'). Android only. | 'dropdown' |
color | Color of the TextInput when in focus. | primary |
isValid | User defined validation function, that returns true for valid input | None |
errorMessage | Error message to display below input, if validation fails | None |
rounded | If Picker style is rounded edges. | false |
underline | If Picker style is an underline. | false |
defaultStyle | If Picker style is default as seen above. | true |
noStyle | If Picker has no framework defined style. | false |
style | Custom Picker inactive style. (Style object) | None |
activeStyle | Custom Picker active style. (Style object) | None |
errorStyle | Custom Picker error style. (Style object) | None |
errorColor | Color of Picker when validation fails | error |
TextArea
Renders a TextInput, that increases in height with the height of the text entered.
<TextArea onChangeText={this.handleTextChange} placeholder="Description" />
Android
iOS

You can use any TextInput property and the following:
| Prop | Description | Default |
|---|---|---|
color | Color of the TextInput when in focus. | primary |
isValid | User defined validation function, that returns true for valid text | None |
errorMessage | Error message to display below input, if validation fails | None |
underline | If TextArea style is an underline. | false |
defaultStyle | If TextArea style is default as seen above. | true |
noStyle | If TextArea has no framework defined style. | false |
style | Custom TextArea inactive style. (Style object) | None |
activeStyle | Custom TextArea active style. (Style object) | None |
errorStyle | Custom TextArea error style. (Style object) | None |
errorColor | Color of TextArea when validation fails | error |
Molecules
Form Elements
FormDatePicker
Uses the Atom DatePicker.
<FormDatePicker onDateChange={this.handleDateChange} label="Date" />
Android
iOS

Additional Props;
| Prop | Description | Default |
|---|---|---|
label | Label to display name of input. (Required) | None |
FormInput
Uses the Atom Input.
<FormInput onChangeText={this.handleTextChange} label="Name" />
Android
iOS

Additional Props;
| Prop | Description | Default |
|---|---|---|
label | Label to display name of input. (Required) | None |
FormPicker
Uses the Atom Picker.
<FormPicker onValueChange={this.handleValueChange} selectedValue={pickerValue} label="Number" data={pickerData} />
Android
iOS

Additional Props;
| Prop | Description | Default |
|---|---|---|
label | Label to display name of input. (Required) | None |
data | An array containing objects with values and labels for each Picker.Item. | None |
FormTextArea
Uses the Atom TextArea.
<FormTextArea onChangeText={this.handleTextChange} label="Description" />
Android
iOS

Additional Props;
| Prop | Description | Default |
|---|---|---|
label | Label to display name of input. (Required) | None |
Simple Notifications
<Notification ref={"alert"} />
To use the Notification Component and pass data to it, you will need to register a Notification manager in componentDidMount and unregister it in componentWillUnmount.
componentDidMount() {
    NotificationBarManager.registerMessageBar(this.refs.alert);
}

componentWillUnmount() {
    NotificationBarManager.unregisterMessageBar();
}
To trigger the Notification display, you will need to run the Notification manager method showAlert.
handleShowNotification = () => {
    NotificationBarManager.showAlert({
        message: 'Your alert message goes here', // required
        icon: { name: "alert" },
        // image: { source: require("./assets/images/accessibility.png") }, // image prop
    });
}
Android
iOS

The data that can be passed to the notification are;
| Prop | Description | Default |
|---|---|---|
message | Message to display. (Required) | None |
shouldHideAfterDelay | If notification should hide after display or keep being shown. | true |
durationToHide | Animation duration for the notification to completely hide. | 350 |
durationToShow | Animation duration for the notification to completely show. | 350 |
duration | Duration of time to display the alert | 3000 |
image | Image to be displayed next to notification message | None |
icon | Icon to be displayed next to notification message | 'alert' |
color | Background color of the Notification body. | '#007bff' |
textColor | Color of the Notification text. | white |
fontSize | Font size of Notification text. Accepts text identifier of above Text atom, or specific number. | 'sub_heading' |
fontWeight | Font weight of the Notification text. | 'bold' |
SnackBars
<SnackBar ref={"alert"} />
To use the SnackBar Component and pass data to it, you will need to register a SnackBar manager in componentDidMount and unregister it in componentWillUnmount.
componentDidMount() {
    SnackManager.registerMessageBar(this.refs.alert);
}

componentWillUnmount() {
    SnackManager.unregisterMessageBar();
}
To trigger the SnackBar display, you will need to run the SnackBar manager method showAlert.
handleShowSnackBar = () => {
    SnackManager.showAlert({
        message: 'Your alert message goes here' // required
    });
}
Android

iOS

The data that can be passed to the SnackBar are;
| Prop | Description | Default |
|---|---|---|
message | Message to display. (Required) | None |
shouldHideAfterDelay | If SnackBar should hide after display or keep being shown. | true |
durationToHide | Animation duration for the SnackBar to completely hide. | 350 |
durationToShow | Animation duration for the SnackBar to completely show. | 350 |
duration | Duration of time to display the alert | 3000 |
backgroundColor | Background color of the SnackBar body. | '#333333' |
onClickDismiss | If SnackBar should hide after clicking the action button. | true |
position | Position of SnackBar notification ('bottom', 'top'). | 'bottom' |
action | An object denoting the method to run when the snack alerts button is clicked . | see below |
The data to be passed to the action prop of a SnackBar;
| Prop | Description | Default |
|---|---|---|
title | Title of the button | 'Close' |
onPress | Method to run when the button is clicked. | internal method to hide alert |
color | Button's text color | error |
ListItem
A List Item that displays a title (required), description and image. This molecule makes use of the Text Atom.
<ListItem title="Heading" description="Description" image={{ source: require("path/to/image.png")}} >
    <ListItem title="Heading" onPress={this.handleButtonClick} description="Description" /> //Nested List Item
</ListItem>
Android
iOS

You can use any TouchableOpacity property and the following:
| Prop | Description | Default |
|---|---|---|
title | Description of List Item. (Required) | None |
description | Description of List Item. | None |
image | Image to display in List Item. You can use all react-native Image properties. | None |
block | If the List Item has full width of the device. | false |
backgroundColor | Background color of List Item. | white |
secondary | If the List Item is nested inside another. | false |
rounded | If the image displayed on the ListItem is rouned or not. | false |
ThinListItem
A List Item that displays a title (required), description and image. This molecule makes use of the Text Atom. Similar to the above molecule but smaller with a few added features
<ThinListItem title="Heading" description="Description" image={{ source: require("path/to/image.png") }} />
You can use any TouchableOpacity property and the following:
| Prop | Description | Default |
|---|---|---|
title | Description of List Item. (Required) | None |
description | Description of List Item. | None |
image | Image to display in List Item. You can use all react-native Image properties. | None |
icon | Icon to display in List Item. You can use all Icon properties. | None |
arrow | If the List Item has an arrow at the right of the item. | false |
backgroundColor | Background color of List Item. | white |
rounded | If the image displayed on the ListItem is rouned or not. | false |
Floating Action Button
This molecule makes use of the Text and Icon Atoms.
One action
<FloatingButton onPress={this.handleAction} image={require("path/to/image.png")} />
Multiple actions
actions = [
    { text: 'Accessibility', image: require("path/to/image.png"), name: 'bt_accessibility', position: 2, onPress: () => this.handleAccessibility() },
    { text: 'Location', icon: "pin", name: 'bt_room', position: 1, onPress: () => this.handleLocation() },
    { text: 'Video', icon: "videocam", name: 'bt_videocam', position: 3, onPress: () => this.handleVideo() }
];

<FloatingButton actions={actions} />
Android
iOS

The props for the main FloatingButton are;
| Prop | Description | Default |
|---|---|---|
| color | Background color of main button. | primary |
| distanceToEdge | Distance from edge of device for FAB positioning. | 30 |
| mainVerticalDistance | Distance of FAB from the bottom of the screen | 0 |
| visible | If the FAB and its children are visible. | true |
| overlayColor | The overlay color of the background. | overlay |
| position | The position of the FAB (center, right). | 'right' |
| showBackground | Show background behind the FAB. | true |
| openOnMount | If FAB should be expanded when page mounts. | false |
| actionsPaddingTopBottom | Spacing between child action items. | 8 |
| iconHeight | Height of button icon. | 15 |
| iconWidth | Width of button icon. | 15 |
| listenKeyboard | If listeners are to be added for the Keyboard component. | false |
| dismissKeyboardOnPress | If keyboard should be dismissed on button click. | false |
| onPress | User defined action to run when FAB main button is clicked. | None |
| onClose | User defined action to run when FAB is closed. | None |
| onOpen | User defined action to run when FAB is expanded. | None |
| onPressBackdrop | User defined action to run when the background of the expanded FAB is clicked. | None |
| onStateChange | User defined action to run when the component state changes | None |
| image | Image to display on FAB main button. | None |
| iconName | Icon to display on FAB main button. | None |
| tabs | If the page also includes a footer navigation | false |
| action | Array of objects which correlate to a FloatingButtonItem | false |
The props for the nested FloatingButtonItems, which is being sent through the actions prop are;
| Prop | Description | Default |
|---|---|---|
| color | Background color of main button. | primary |
| image | Image to display on FAB main button. | None |
| icon | Icon to display on FAB main button. | None |
| name | Unique name for each button. (Required) | None |
| textContainerStyle | Style of text container | None |
| text | Text to be displayed next to button. | None |
| textStyle | Style of text. | None |
| textProps | Other text props. | 'right' |
| textBackground | Background color of text. | white |
| textColor | Font color of text. | darkGrey |
| textElevation | Shadow of text element. | 5 |
| position | The position of the FAB (center, right). | None |
| active | If FAB is expanded or not. | None |
| distanceToEdge | Distance from edge of device for FAB positioning. | 30 |
| paddingTopBottom | Vertical padding of each action item. | None |
| onPress | User defined action to run when FAB child action button is clicked. | None |
| margin | Padding right of each action item, if the position of FAB is 'right' | 8 |
Card
A Card that displays a title (required), description and image.
<Card title="Heading" description="Description" image={{ source: require("path/to/image.png")}} />
Android
iOS

You can use any TouchableOpacity property and the following:
| Prop | Description | Default |
|---|---|---|
title | Description of Card. (Required) | None |
description | Description of Card. | None |
image | Image to display in Card. You can use all react-native Image properties. | None |
block | If the Card has full width of the device. | false |
backgroundColor | Background color of Card. | white |
Organisms
Form
formElements = [
    { label: "Full Name", type: "text", onChangeText: (value) => this.handleTextChange(value), placeholder: "John Doe" },
    { label: "Email", type: "text", onChangeText: (value) => this.handleTextChange(value), placeholder: "john.doe@gmail.com", isValid: (value) => this.checkInputValidity(value) },
    { label: "Type", type: "picker", onValueChange: (value) => this.handleValueChange(value), pickerData: this.pickerData },
    { label: "Date", type: "date", onDateChange: (value) => this.handleDateChange(value) },
    { label: "Address", type: "textarea", onChangeText: (value) => this.handleTextChange(value) },
];

<Form formElements={formElements} />
Android
iOS
The Form Component iterates through the formElements array, to render the fields according to the type of input specified in each object. The form object only has one extra prop;
| Prop | Description | Default |
|---|---|---|
color | Color of all form elements when in focus. | primary |
rounded | If form element style is rounded edges. | false |
underline | If form element style is an underline. | false |
defaultStyle | If form element style is default as seen above. | true |
noStyle | If form element has no framework defined style. | false |
style | Custom form element inactive style. (Style object) | None |
activeStyle | Custom form element active style. (Style object) | None |
errorStyle | Custom form element error style. (Style object) | None |
But each type of input has corresponding proptypes to the molecules named below;
| Type | Molecule Component |
|---|---|
'text' | FormInput |
'textarea' | FormTextArea |
'date' | FormDatePicker |
'picker' | FormPicker |
ListView
A vertical list of ListItem molecules
listData = [
    { title: "Heading 1", description: "Description 1", image: { source: require("path/to/image.png")} },
    { title: "Heading 2", description: "Description 2", image: { source: require("path/to/image.png")} },
    { title: "Heading 3", description: "Description 3", image: { source: require("path/to/image.png")} }
];

<ListView data={listData} />
You can also pass a custom renderItem method to the ListView, to render ListItems with other TouchableOpacity props, like onPress;
handleListItemClick = (title, description) => {
    Alert.alert(title, description);
}

<ListView data={listData} renderItem={({item}) => <ListItem {...item} onPress={() => handleListItemClick(item.title, item.description)} />} />
Android
iOS

You can use any FlatList property and the following:
| Prop | Description | Default |
|---|---|---|
backgroundColor | Background color of all cards. | white |
thin | If the 'ThinListItem' is the component to be rendered. | false |
rounded | If the image displayed on the ListItem is rouned or not. | false |
The data to be sent to the ListView needs to contain the same fields as the props of ListItem component.
CardList
A vertical/horizontal List of Card molecules.
listData = [
    { title: "Heading 1", description: "Description 1", image: { source: require("path/to/image.png")} },
    { title: "Heading 2", description: "Description 2", image: { source: require("path/to/image.png")} },
    { title: "Heading 3", description: "Description 3", image: { source: require("path/to/image.png")} }
];

<CardList data={listData} />
You can also pass a custom renderItem method to the CardList, to render Cards with other TouchableOpacity props, like onPress;
handleListItemClick = (title, description) => {
    Alert.alert(title, description);
}

<CardList data={listData} renderItem={({item}) => <Card {...item} onPress={() => handleListItemClick(item.title, item.description)} />} />
Android
iOS

You can use any FlatList property and the following:
| Prop | Description | Default |
|---|---|---|
backgroundColor | Background color of all cards. | white |
The data to be sent to the CardList needs to contain the same fields as the props of Card component.
NavBar
The Navigation Header makes use of the Text and Icon atom.
<NavBar>
    <NavBarLeft>
        <NavBarButton type="drawer" />
    </NavBarLeft>
    <NavBarBody>
        <Text>Title</Text>
    </NavBarBody>
    <NavBarRight>
        <NavBarButton onPress={this.handleFavourites} >
            <Icon name="heart" />
        </NavBarButton>
    </NavBarRight>
</NavBar>
Android
iOS

NavBar is the main container for the header. It makes use of the View property and the following:
| Prop | Description | Default |
|---|---|---|
transparent | If status bar above header is transparent | None |
statusBarColor | Background color of the NavBar. | primary for Android, '#F8F8F8' for iOS |
statusBarColor | Content type of the StatusBar.('light-content', 'dark-content') | 'light-content' for Android, 'dark-content' for iOS |
NavBarBody is a container that displays its children in the center of the header. It only accepts the title of the page within a Text tag. It makes use of the View property and the following:
| Prop | Description | Default |
|---|---|---|
color | Color of the titleText. | white for Android, black for iOS |
NavBarLeft displays its children on the left while, NavBarRight is displays its children on the right side of the header. All headers must contain these three tags, to render uniformly.
NavBarButton is the button element to be used within the NavBar. It will only accept the atoms Text, Icon and a react-native Image. It contains the same property as a TouchableOpacity. It also comes with an inbuilt type for common features, which are 'drawer', 'back' and 'search'.
| Prop | Description | Default |
|---|---|---|
type | Built in UI implementation of common NavBar button (drawer, back, search) | None |
color | Text and Icon color of button. | white for Android, '#0a60ff' for iOS |
TabBar
The Navigation Footer makes use of the Text and Icon atom.
<TabBar>
    <TabItem active>
        <Icon name="heart" />
        <Text>Favorites</Text>
    </TabItem>
    <TabItem>
        <Icon name="add" />
        <Text>Add New</Text>
    </TabItem>
    <TabItem>
        <Icon name="camera" />
        <Text>Camera</Text>
    </TabItem>
    <TabItem>
        <Icon name="settings" />
        <Text>Settings</Text>
    </TabItem>
</TabBar>
Android
iOS

TabBar is the main container for the footer navigation. It makes use of the View property and the following:
| Prop | Description | Default |
|---|---|---|
color | Background color of the TabBar. | primary for Android, '#F8F8F8' for iOS |
activeColor | Text and Icon color of active tab. | white for Android, '#0a60ff' for iOS |
inactiveColor | Text and Icon color of inactive tab. | 'rgba(209, 216, 224, 0.8)' for Android, '#8e8e93' for iOS |
top | If the TabBar is on top of the page. Android only. | false |
TabItem is the button element to be used within the TabBar. It will only accept the atoms Text, Icon and a react-native Image. It contains the same property as a TouchableOpacity. In addition, it contains the following properties as well;
| Prop | Description | Default |
|---|---|---|
activeColor | Text and Icon color of active tab. | white for Android, '#0a60ff' for iOS |
inactiveColor | Text and Icon color of inactive tab. | 'rgba(209, 216, 224, 0.8)' for Android, '#8e8e93' for iOS |
active | If current TabItem is active. | false |
PillBar
The Pill Navigation Bar.
pillScenes = [
    { scene: <Home /> },
    { scene: <CardList data={listData} /> },
    { scene: <ListView data={listData} /> },
    { scene: <View style={styles.innerContainer}><Form formElements={formElements} /></View> },
];

pillHeaders = [
    { title: 'Home', icon: "home" },
    { title: 'Card List', icon: "card" },
    { title: 'List View', icon: "list" },
    { title: 'Form', icon: "help" }
];

<PillView pillHeaders={pillHeaders} pillScenes={pillScenes} />
Android
iOS

The index of the pillHeader object, will be used to query the corresponding pillScene, during transition.
PillBar is the main container for the pill navigation. It makes use of the View property and the following:
| Prop | Description | Default |
|---|---|---|
color | Active color of the PillBar. Android only. | primary for Android, '#0a60ff' for iOS |
This property color, will be passed down to child element PillItem as the activeColor prop mentioned below
PillItem is the button element to be used within the PillBar. It will only accept the atoms Text, Icon and a react-native Image. It contains the same property as a TouchableOpacity. In addition, it contains the following properties as well;
| Prop | Description | Default |
|---|---|---|
activeColor | Text and Icon color of active tab. | white for Android, '#0a60ff' for iOS |
inactiveColor | Text and Icon color of inactive tab. Android only. | '#adadad' |
active | If current PillItem is active. | false |
Contributing
Please read CONTRIBUTING.md for details on our code of conduct, and the process for submitting pull requests to us.
Versioning
We use SemVer for versioning.
Authors
- Sameeha Rahman - Initial work - samsam-026
- Muditha Batagoda - Initial Design - mudithabatagoda
See also the list of contributors who participated in this project.
License
This project is licensed under the MIT License - see the LICENSE.md file for details
