如何设置 Canvas.ZIndex 在控件之间绘制黑色面板?
使用以下代码,我可以演示不透明度为 50% 的黑色面板如何位于每个矩形的顶部:
 <Grid>
    <Rectangle Fill="Black" HorizontalAlignment="Stretch" VerticalAlignment="Stretch" Opacity="0.5" Canvas.ZIndex="1"/>
    <Rectangle Fill="Red" Width="200" Height="200" Canvas.ZIndex="0"/>
    <Grid>
        <Rectangle Fill="Blue" Width="100" Height="100" Canvas.ZIndex="0"/>
        <Rectangle Fill="Yellow" Width="50" Height="50" Canvas.ZIndex="1"/>
    </Grid>
</Grid>
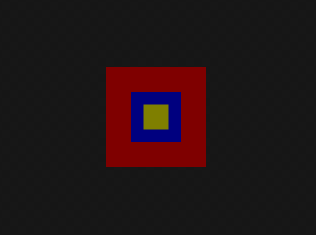
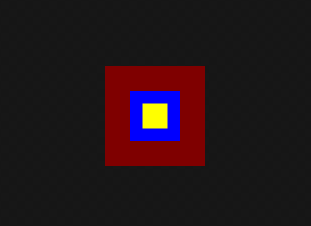
它看起来像这样:

我希望在黑色面板上方有黄色矩形,但这似乎是不可能的。
我可以通过将包含蓝色和黄色矩形的网格的 ZIndex 设置为“1”来实现接近的效果。但这也会使蓝色矩形升高到黑色矩形上方,这是一个问题。
<Grid>
    <Rectangle Fill="Black" HorizontalAlignment="Stretch" VerticalAlignment="Stretch" Opacity="0.5" Canvas.ZIndex="1"/>
    <Rectangle Fill="Red" Width="200" Height="200" Canvas.ZIndex="0"/>
    <Grid Canvas.ZIndex="1">
        <Rectangle Fill="Blue" Width="100" Height="100" Canvas.ZIndex="0"/>
        <Rectangle Fill="Yellow" Width="50" Height="50" Canvas.ZIndex="1"/>
    </Grid>
</Grid>

如何仅获取黑色上方的黄色矩形? 在我的实际应用程序中,我有用户控件而不是矩形。我喜欢通过让其他所有内容都被半黑阴影覆盖来使特定的控件脱颖而出。
非常感谢,
With the following code I can demonstrate how a black panel with a opacity of 50% is on top of every rectangle:
 <Grid>
    <Rectangle Fill="Black" HorizontalAlignment="Stretch" VerticalAlignment="Stretch" Opacity="0.5" Canvas.ZIndex="1"/>
    <Rectangle Fill="Red" Width="200" Height="200" Canvas.ZIndex="0"/>
    <Grid>
        <Rectangle Fill="Blue" Width="100" Height="100" Canvas.ZIndex="0"/>
        <Rectangle Fill="Yellow" Width="50" Height="50" Canvas.ZIndex="1"/>
    </Grid>
</Grid>
It looks like this:

I would like to have the yellow rectangle above the black panel, but that seems to be impossible.
I can achieve something close by setting the ZIndex of the Grid containing both the Blue and Yellow rectangles to "1". But this would also raise the blue rectangle above the black, and this is a problem.
<Grid>
    <Rectangle Fill="Black" HorizontalAlignment="Stretch" VerticalAlignment="Stretch" Opacity="0.5" Canvas.ZIndex="1"/>
    <Rectangle Fill="Red" Width="200" Height="200" Canvas.ZIndex="0"/>
    <Grid Canvas.ZIndex="1">
        <Rectangle Fill="Blue" Width="100" Height="100" Canvas.ZIndex="0"/>
        <Rectangle Fill="Yellow" Width="50" Height="50" Canvas.ZIndex="1"/>
    </Grid>
</Grid>

How do I get only the yellow rectangle above the black?
In my real application I have user controls instead of the rectangles. I like to make a particular control standing out by having everything else covered by the half-black shade.
Many Thanks,
如果你对这篇内容有疑问,欢迎到本站社区发帖提问 参与讨论,获取更多帮助,或者扫码二维码加入 Web 技术交流群。

绑定邮箱获取回复消息
由于您还没有绑定你的真实邮箱,如果其他用户或者作者回复了您的评论,将不能在第一时间通知您!

发布评论
评论(2)
我认为您无法通过当前的控件安排来实现这一目标。
这里有两个级别的控件,内部网格内的“蓝色”和“黄色”控件,然后是与内部网格一起的“黑色”和“红色”控件。
ZIndex适用于以下位置的控件:相同的“级别” - 因此您可以确保黄色控件位于蓝色之上,但是在更高级别上,它们被分组在内部网格下,因此被视为单个单元唯一可行的方法是如果 。如果您添加了第二个控件,则所有控件都处于同一级别。内部网格中的半不透明矩形,您可以将黄色置于其顶部,但这可能最终会使其他控件太暗。
I don't think you'll be able to achieve this with your current arrangement of controls.
There are two levels of controls here, the "Blue" and "Yellow" controls inside the inner grid and then the "Black" and "Red controls together with the inner grid.
The
ZIndexworks on controls at the same "level" - so you can ensure that the yellow control is on top of the blue, but then at the higher level these are grouped under the inner grid so are treated as a single unit.The only way this would work is if all your controls were at the same level. If you included a second semi opaque rectangle in the inner grid you could get the yellow to be on top of that but that might end up making other controls too dark.
一种方法可能是不只使用简单的黑色矩形。
而是使用由两个矩形组成的路径。第一个矩形将覆盖整个区域,第二个矩形将仅覆盖可用的控件。
这将创建一个大矩形,其中有一个孔,您的目标控件可以在其中显示并接受输入。
缺点是计算出要添加的矩形几何形状以创建孔,但这相当简单。
One approach might be to not use just a simple black rectangle.
Instead use a Path composed of two rectangles. The first rectangle will cover the whole area and the second would just cover the control to be available.
This creates a large rectangle with a hole in it where your target control can show through and accept input.
The down side is working out the rectangle geometry to add to create the hole but that's fairly straight forward.