RMagick 从图像中删除白色背景并使其透明

发布于 2024-12-09 13:13:11 字数 229 浏览 0 评论 0原文

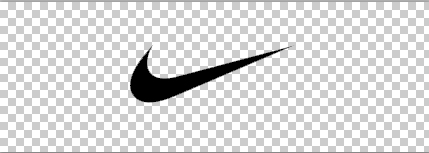
我需要从此图像中删除白色背景并使背景透明。所以它只是导出为 png 的透明背景上的黑色勾号。

例如将

在此处输入图像描述

转换为

在此处输入图像描述

有什么想法吗?

I need to remove the white background from this image and make the background transparent. So it's just a black tick on the transparent background exported as a png.

e.g. Turn

enter image description here

Into

enter image description here

Any ideas?

如果你对这篇内容有疑问,欢迎到本站社区发帖提问 参与讨论,获取更多帮助,或者扫码二维码加入 Web 技术交流群。

扫码二维码加入Web技术交流群

发布评论

需要 登录 才能够评论, 你可以免费 注册 一个本站的账号。

评论(3

月下伊人醉 2024-12-16 13:13:11

convert image.png -matte -fill none -fuzz 1% -opaque white result.png

用透明度替换任何白色。绒毛选项包括任何接近白色的东西。

convert image.png -matte -fill none -fuzz 1% -opaque white result.png

Replaces anything white with transparency. The fuzz option includes anything that is almost-white.

笔芯 2024-12-16 13:13:11

我知道我参加聚会已经很晚了,但是自从这个问题首次发布以来,很多事情都发生了变化,所以今天您可以使用至少版本 2.15.4rmagick 来做到这一点假设

您在可访问的地方有图像:

image = Magick::Image.new(path_to_file)
image.background_color = 'none'

如果您还想修剪图像,使其仅与边界一样大,只需使用 .trim!

image.trim!

编辑:

结果上面的解决方案并不真正适用于所有用例。更通用的解决方案是这样的:

# the image needs to be in 'PNG' format
image.format = 'PNG'

# set a fuzz on the image depending on how accurate you want to be
image.fuzz = '10%'

# get the image background color
background_color = image.background_color

# convert pixels based on their color to being transparent
# the fuzz set above controls how accurate the conversion will be
image.paint_transparent(background_color)

I know I am pretty late to the party, but a lot has changed since this question was first posted, so here is how you can do it today using at least version 2.15.4 of rmagick

Assuming you have the image somewhere accessible:

image = Magick::Image.new(path_to_file)
image.background_color = 'none'

If you also want to trim the image so it's only as big as it boundaries, simply use .trim!

image.trim!

EDIT:

Turns out the solution above does not really work for all use cases. A more general solution is this:

# the image needs to be in 'PNG' format
image.format = 'PNG'

# set a fuzz on the image depending on how accurate you want to be
image.fuzz = '10%'

# get the image background color
background_color = image.background_color

# convert pixels based on their color to being transparent
# the fuzz set above controls how accurate the conversion will be
image.paint_transparent(background_color)
淡淡绿茶香 2024-12-16 13:13:11

对于 v6.8.4-Q16,使用以下命令:

convert nike.png -matte -fill none -fuzz 1% -opaque white nikeOutput.png

结果:

在此处输入图像描述

这是我使用的命令:

convert nike.jpg -transparent white NikeProd.png

< img src="https://i.sstatic.net/Fdmm1.png" alt="在此处输入图像描述">

With v6.8.4-Q16 using the below command:

convert nike.png -matte -fill none -fuzz 1% -opaque white nikeOutput.png

Results in:

enter image description here

Here is the command I use:

convert nike.jpg -transparent white NikeProd.png

enter image description here

enter image description here

~没有更多了~
我们使用 Cookies 和其他技术来定制您的体验包括您的登录状态等。通过阅读我们的 隐私政策 了解更多相关信息。 单击 接受 或继续使用网站,即表示您同意使用 Cookies 和您的相关数据。
原文