如何在 iPhone 上以编程方式绘制椭圆形气泡?

发布于 2024-12-05 14:40:21 字数 204 浏览 1 评论 0原文

类似问题中显示的技术是一个矩形气泡。如何画一个椭圆形?即:

在此处输入图像描述

The technique shown in a similar question is a rectangular bubble. How to draw one in an oval shape? i.e.:
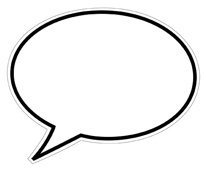
   enter image description here

如果你对这篇内容有疑问,欢迎到本站社区发帖提问 参与讨论,获取更多帮助,或者扫码二维码加入 Web 技术交流群。

扫码二维码加入Web技术交流群

发布评论

需要 登录 才能够评论, 你可以免费 注册 一个本站的账号。

评论(2

青春如此纠结 2024-12-12 14:40:21

我会分两次迭代完成。
首先获取上下文并开始一条路径。填充一个椭圆,然后填充一个用三条线包围三角形的自定义路径。我假设以下尺寸:70 宽度,62 高度。覆盖 UIView 子类中的绘制矩形并在子类 UIViewController 中实例化:

-(void)drawRect:(CGRect)rect {
    CGContextRef ctx = UIGraphicsGetCurrentContext();
    CGContextSetRGBFillColor(ctx, 0.0, 0.0, 1.0, 1.0);
    CGContextFillEllipseInRect(ctx, CGRectMake(0.0, 0.0, 70.0, 50.0)); //oval shape
    CGContextBeginPath(ctx);
    CGContextMoveToPoint(ctx, 8.0, 40.0);
    CGContextAddLineToPoint(ctx, 6.0, 50.0);
    CGContextAddLineToPoint(ctx, 18.0, 45.0);
    CGContextClosePath(ctx);
    CGContextFillPath(ctx);
}

当在灰色背景上添加时,在 iPhone 模拟器中生成此内容:

在此处输入图像描述

第二个代码示例几乎会重复您上面生成的内容。我使用灵活的尺寸实现了这一点,当您实例化 UIView 框架时,可以将其提供给 UIView 框架。本质上,对话气泡的白色部分是用黑色描边绘制的。

-(void)drawRect:(CGRect)rect {
    CGContextRef ctx = UIGraphicsGetCurrentContext();
    CGRect aRect = CGRectMake(2.0, 2.0, (self.bounds.size.width * 0.95f), (self.bounds.size.width * 0.60f)); // set the rect with inset.
    CGContextSetRGBFillColor(ctx, 1.0, 1.0, 1.0, 1.0); //white fill
    CGContextSetRGBStrokeColor(ctx, 0.0, 0.0, 0.0, 1.0); //black stroke
    CGContextSetLineWidth(ctx, 2.0); 


    CGContextFillEllipseInRect(ctx, aRect); 
    CGContextStrokeEllipseInRect(ctx, aRect);    

    CGContextBeginPath(ctx);
    CGContextMoveToPoint(ctx, (self.bounds.size.width * 0.10), (self.bounds.size.width * 0.48f));
    CGContextAddLineToPoint(ctx, 3.0, (self.bounds.size.height *0.80f));
    CGContextAddLineToPoint(ctx, 20.0, (self.bounds.size.height *0.70f));
    CGContextClosePath(ctx);
    CGContextFillPath(ctx);

    CGContextBeginPath(ctx);
    CGContextMoveToPoint(ctx, (self.bounds.size.width * 0.10), (self.bounds.size.width * 0.48f));
    CGContextAddLineToPoint(ctx, 3.0, (self.bounds.size.height *0.80f));
    CGContextStrokePath(ctx);

    CGContextBeginPath(ctx);
    CGContextMoveToPoint(ctx, 3.0, (self.bounds.size.height *0.80f));
    CGContextAddLineToPoint(ctx, 20.0, (self.bounds.size.height *0.70f));
    CGContextStrokePath(ctx);
 }

在此处输入图像描述

I would do it in two iterations.
First get the context and begin a path. Fill an ellipse and then a custom path that encloses a triangle with three lines. I assumed the following dimensions: 70 width, 62 height. Override draw rect in a subclass of UIView and instantiate in a subclassed UIViewController:

-(void)drawRect:(CGRect)rect {
    CGContextRef ctx = UIGraphicsGetCurrentContext();
    CGContextSetRGBFillColor(ctx, 0.0, 0.0, 1.0, 1.0);
    CGContextFillEllipseInRect(ctx, CGRectMake(0.0, 0.0, 70.0, 50.0)); //oval shape
    CGContextBeginPath(ctx);
    CGContextMoveToPoint(ctx, 8.0, 40.0);
    CGContextAddLineToPoint(ctx, 6.0, 50.0);
    CGContextAddLineToPoint(ctx, 18.0, 45.0);
    CGContextClosePath(ctx);
    CGContextFillPath(ctx);
}

Produces this in the iPhone simulator when added against a gray backdrop:

enter image description here

This second code example will almost duplicate what you produced above. I implemented this using flexible sizes that could be supplied to the UIView frame when you instantiate it. Essentially, the white portion of the speech bubble is drawn with a black stroke over lay to follow.

-(void)drawRect:(CGRect)rect {
    CGContextRef ctx = UIGraphicsGetCurrentContext();
    CGRect aRect = CGRectMake(2.0, 2.0, (self.bounds.size.width * 0.95f), (self.bounds.size.width * 0.60f)); // set the rect with inset.
    CGContextSetRGBFillColor(ctx, 1.0, 1.0, 1.0, 1.0); //white fill
    CGContextSetRGBStrokeColor(ctx, 0.0, 0.0, 0.0, 1.0); //black stroke
    CGContextSetLineWidth(ctx, 2.0); 


    CGContextFillEllipseInRect(ctx, aRect); 
    CGContextStrokeEllipseInRect(ctx, aRect);    

    CGContextBeginPath(ctx);
    CGContextMoveToPoint(ctx, (self.bounds.size.width * 0.10), (self.bounds.size.width * 0.48f));
    CGContextAddLineToPoint(ctx, 3.0, (self.bounds.size.height *0.80f));
    CGContextAddLineToPoint(ctx, 20.0, (self.bounds.size.height *0.70f));
    CGContextClosePath(ctx);
    CGContextFillPath(ctx);

    CGContextBeginPath(ctx);
    CGContextMoveToPoint(ctx, (self.bounds.size.width * 0.10), (self.bounds.size.width * 0.48f));
    CGContextAddLineToPoint(ctx, 3.0, (self.bounds.size.height *0.80f));
    CGContextStrokePath(ctx);

    CGContextBeginPath(ctx);
    CGContextMoveToPoint(ctx, 3.0, (self.bounds.size.height *0.80f));
    CGContextAddLineToPoint(ctx, 20.0, (self.bounds.size.height *0.70f));
    CGContextStrokePath(ctx);
 }

enter image description here

隔纱相望 2024-12-12 14:40:21

我有另一种方法 - 但我没有时间正确解释它。

但是,我的示例是用 .NET 编写的,以便在 Windows 应用程序中使用。

我的版本将整个对话气泡创建为 2D 多边形网格,并且可以部分自定义。它是一条绘制的路径,而不是多个部分。

虽然我们的平台不一样 - 该技术使用常见的数学例程和程序循环。我相信该技术可以转化为其他编程语言或平台。

 Private Sub Generate(ByVal Resolution As Integer, Optional ByVal SpeachPointerAngle As Integer = (45 * 3), Optional ByVal PointerBend As Decimal = 15)

        'Generated the same way we create vector (wireframe) mesh for an Ellipse but...
        '... at a predefined defined angle we create 

        'the size of the Pointer TIP/Corner portion of the speach bubble
        'in relation to the EDGE of the ELLIPSE (average)
        Dim SpeachPointerSize As Integer = 30

        If PointerBend > 10 Then PointerBend = 10
        If PointerBend < -10 Then PointerBend = -10

        'as a variable offset that should be limited to max +/-   -15 to 15 degrees relative to current angle as a safe range
        '- were speach pointer angle determins which side the the pointer appears
        Dim PointerOffsetValue As Decimal = PointerBend
        Dim ActualPointerAngle As Decimal

        'SpeachPointerAngle = 360 - SpeachPointerAngle ' adjust orientation so that 0 degrees is SOUTH

        'Ellipse Size:
        Dim Size_X As Decimal = 80
        Dim Size_Y As Decimal = 50

        If Resolution < 30 Then Resolution = 30

        Dim Result As Vector2()

        'size of each angle step based on resolution (number of vectors ) - Mesh Quality in otherwords.
        Dim _Step As Decimal = 360 / Resolution

        'Our current angle as we step through  the loop
        Dim _CurrentAngle As Decimal = 0

        'rounded values
        Dim _LastAngle As Decimal = 0
        Dim _NextAngle As Decimal = _Step

        Dim SpeachDrawn As Boolean = False ' prevent creating more than 1 point to be safe

        Dim I2 As Integer = 0 'need a stepper because of skipped IDS 

        'build the ellipse mesh 
        For i = 0 To Resolution - 1

            _LastAngle = _CurrentAngle - 15
            _NextAngle = _CurrentAngle + 15

            ActualPointerAngle = _CurrentAngle 'side
            ActualPointerAngle += PointerOffsetValue ' acual angle of point

            Dim EX As Decimal = System.Math.Cos(Math.Deg2Rad(_CurrentAngle)) * Size_X
            Dim EY As Decimal = System.Math.Sin(Math.Deg2Rad(_CurrentAngle)) * Size_Y

            'Point extrusion size ( trying to be even size all around )
            Dim ExtrudeX As Decimal = System.Math.Cos(Math.Deg2Rad(_CurrentAngle)) * (Size_X + SpeachPointerSize)
            Dim ExtrudeY As Decimal = System.Math.Sin(Math.Deg2Rad(_CurrentAngle)) * (Size_Y + SpeachPointerSize)

            'is Pointer angle between Last and Next?
            If SpeachPointerAngle > _LastAngle And SpeachPointerAngle < _NextAngle Then
                If (SpeachDrawn = False) Then
                    ' the point for the speachbubble tip
                    Array.Resize(Result, I2 + 1)
                    
                    Result(I2) = New Vector2(ExtrudeX, ExtrudeY)
                    SpeachDrawn = True
                    I2 += 1
                Else
                    'skip
                End If
            Else
                'normal ellipse vector
                Array.Resize(Result, I2 + 1)
                Result(I2) = New Vector2(EX, EY)
                I2 += 1
            End If

            _CurrentAngle += _Step

        Next

        _Vectors = Result
    End Sub

上面的代码生成了这个 - 使用 GDI+ [DrawPolygon/FillPolygon] 绘制到位图:
https://fbcdn-sphotos-a.akamaihd.net/hphotos-ak-ash4/380262_10151202393414692_590995900_n.jpg

(抱歉 - 我无法直接在此处发布图像,因为我从未发布过我之前还没有这个声誉)

这是一个原始类型 。在图形程序集中,我正在为 .NET 开发,它使用我自己的 Vector2。

此对话气泡在绘制时支持透明度 - 因为它是单个多边形形状而不是多个形状。

基本上,我们以编程方式绘制一个椭圆,然后在椭圆的所需一侧挤出一个语音点。

可以使用 PointF 结构来应用类似的方法。

代码中的所有形状都是在原点 0,0 周围生成的。

当添加向量时,数组也会逐渐调整大小,以防止数组中出现间隙。

EG - 对话气泡的中心是原点 0.0。

我很抱歉没有正确解释我的代码 - 我只是没有时间。
但这可能并不太难理解。

I have another way - however I dont have any time to properly explain it.

However, my example was written in .NET for use in a Windows application.

My version creates the entire speach bubble as 2D Polygon Mesh and is partially customizable. It is a single drawn path instead of multiple parts.

While our platforms are not the same - the technique uses common math routines and procedural loop. I believe the technique could be translated to other programming languages or platforms.

 Private Sub Generate(ByVal Resolution As Integer, Optional ByVal SpeachPointerAngle As Integer = (45 * 3), Optional ByVal PointerBend As Decimal = 15)

        'Generated the same way we create vector (wireframe) mesh for an Ellipse but...
        '... at a predefined defined angle we create 

        'the size of the Pointer TIP/Corner portion of the speach bubble
        'in relation to the EDGE of the ELLIPSE (average)
        Dim SpeachPointerSize As Integer = 30

        If PointerBend > 10 Then PointerBend = 10
        If PointerBend < -10 Then PointerBend = -10

        'as a variable offset that should be limited to max +/-   -15 to 15 degrees relative to current angle as a safe range
        '- were speach pointer angle determins which side the the pointer appears
        Dim PointerOffsetValue As Decimal = PointerBend
        Dim ActualPointerAngle As Decimal

        'SpeachPointerAngle = 360 - SpeachPointerAngle ' adjust orientation so that 0 degrees is SOUTH

        'Ellipse Size:
        Dim Size_X As Decimal = 80
        Dim Size_Y As Decimal = 50

        If Resolution < 30 Then Resolution = 30

        Dim Result As Vector2()

        'size of each angle step based on resolution (number of vectors ) - Mesh Quality in otherwords.
        Dim _Step As Decimal = 360 / Resolution

        'Our current angle as we step through  the loop
        Dim _CurrentAngle As Decimal = 0

        'rounded values
        Dim _LastAngle As Decimal = 0
        Dim _NextAngle As Decimal = _Step

        Dim SpeachDrawn As Boolean = False ' prevent creating more than 1 point to be safe

        Dim I2 As Integer = 0 'need a stepper because of skipped IDS 

        'build the ellipse mesh 
        For i = 0 To Resolution - 1

            _LastAngle = _CurrentAngle - 15
            _NextAngle = _CurrentAngle + 15

            ActualPointerAngle = _CurrentAngle 'side
            ActualPointerAngle += PointerOffsetValue ' acual angle of point

            Dim EX As Decimal = System.Math.Cos(Math.Deg2Rad(_CurrentAngle)) * Size_X
            Dim EY As Decimal = System.Math.Sin(Math.Deg2Rad(_CurrentAngle)) * Size_Y

            'Point extrusion size ( trying to be even size all around )
            Dim ExtrudeX As Decimal = System.Math.Cos(Math.Deg2Rad(_CurrentAngle)) * (Size_X + SpeachPointerSize)
            Dim ExtrudeY As Decimal = System.Math.Sin(Math.Deg2Rad(_CurrentAngle)) * (Size_Y + SpeachPointerSize)

            'is Pointer angle between Last and Next?
            If SpeachPointerAngle > _LastAngle And SpeachPointerAngle < _NextAngle Then
                If (SpeachDrawn = False) Then
                    ' the point for the speachbubble tip
                    Array.Resize(Result, I2 + 1)
                    
                    Result(I2) = New Vector2(ExtrudeX, ExtrudeY)
                    SpeachDrawn = True
                    I2 += 1
                Else
                    'skip
                End If
            Else
                'normal ellipse vector
                Array.Resize(Result, I2 + 1)
                Result(I2) = New Vector2(EX, EY)
                I2 += 1
            End If

            _CurrentAngle += _Step

        Next

        _Vectors = Result
    End Sub

The above code generated this - drawn to a bitmap using GDI+ [DrawPolygon/FillPolygon]:
https://fbcdn-sphotos-a.akamaihd.net/hphotos-ak-ash4/380262_10151202393414692_590995900_n.jpg

(Sorry - I can't post the image here directly as I have never posted here before. I don't have the reputation yet )

This is a Primitive in a Graphics Assembly I am developing for .NET which uses my own Vector2.

This speach bubble supports transparency when drawn - as it is a single polygon shape instead of multiple shapes.

Basically we draw an ellipse programatically and then extrude a speach point out on a desired side of the ellipse.

A similar approach could be applied using PointF structures instead.

All shapes in the code are generated around Origin 0,0.

Arrays are also resized incrementally as vectors are added prevent gaps in the array.

EG - the center of the speach bubble is Origin 0.0.

I apologize for not explaining my code properly - I just don't have the time.
But it probably isnt too hard to understand.

~没有更多了~
我们使用 Cookies 和其他技术来定制您的体验包括您的登录状态等。通过阅读我们的 隐私政策 了解更多相关信息。 单击 接受 或继续使用网站,即表示您同意使用 Cookies 和您的相关数据。
原文