WPF Viewport3D 中单色 3D 对象的有用照明
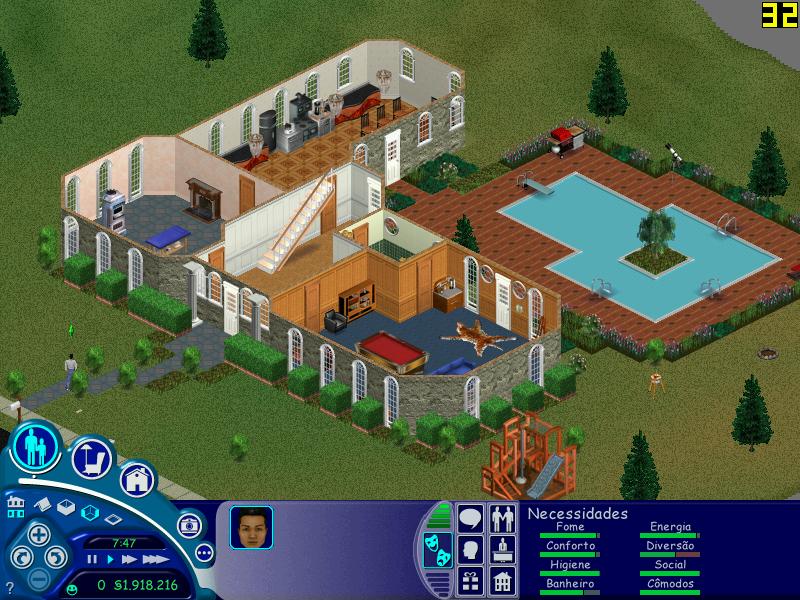
我有一个房子的 3D 模型,其中屋顶是不可见的,因此可以看到房间 (就像这里)
但是(现在)我有没有纹理并且每个表面具有相同的颜色,例如,
var myMaterial = new DiffuseMaterial (new SolidColorBrush(myColor))
如果我在 WPF Viewport3D 中查看它,我希望能够区分表面。 例如,我想看看地板何时结束、墙壁何时开始。
这应该可以通过照亮物体来实现。我已经尝试过:
环境光不起作用,因为所有表面看起来颜色相同:
myViewport3D.Children.Add(new ModelVisual3D(){Content = new AmbientLight(Colors.White)})
如果我使用定向光并将其位置固定在移动相机上,某些表面法线有时几乎垂直于相机/光,因此几乎黑色,看起来更不自然。
那么在 WPF Viewport3D 中区分单色 3DObject 的表面的好方法是什么?
在用户“jdv”发表评论后编辑
I have a 3D Modell of a house, where the roof is invisible so that the rooms can be seen
(like here)
But (for now) I have no textures and each surface has the same color, e.g.,
var myMaterial = new DiffuseMaterial (new SolidColorBrush(myColor))
If I view it in a WPF Viewport3D, I want to be able to differentiate between the surfaces.
e.g., I want to see when the floor ends and the wall starts.
This should be possible by lighting the object. I already tried:
Ambient light doesn't work, because all surfaces would look equally colored:
myViewport3D.Children.Add(new ModelVisual3D(){Content = new AmbientLight(Colors.White)})
And if I use directional light and stick its position to the moving camera, some surface normals are sometimes nearly perpendicular to the camera/light and so are nearly black, which looks even more unnatural.
So what is a good way to distinguish the surfaces of a single-colored 3DObject in a WPF Viewport3D?
Edited after user "jdv" wrote his comment
如果你对这篇内容有疑问,欢迎到本站社区发帖提问 参与讨论,获取更多帮助,或者扫码二维码加入 Web 技术交流群。

绑定邮箱获取回复消息
由于您还没有绑定你的真实邮箱,如果其他用户或者作者回复了您的评论,将不能在第一时间通知您!


发布评论
评论(2)
就我个人而言,我发现通过组合两种灯可以实现“最佳”效果。
另外,如果表面法线并不总是正确的,您可以使用第三个光源 - 另一个指向与第一个光源相反方向的定向光源。如果法线不合适,这将照亮曲面的背面。
Personally, I find that this can be accomplished the "best" by a combination of two lights.
Also, if your surface normals are not always going to be correct, you can use a third light - another directional light pointing the opposite direction of the first. This will light the back faces of the surfaces if you've got inappropriate normals.
由于您可以使用 2 个光源,因此我会尝试使用昏暗的光作为环境背景光,并使用稍强的定向光来与表面形成对比。
我不是 3D 专家,但会这样想:
在黑暗的房间(没有环境光)中,使用手电筒(定向光),您会根据表面与手电筒的角度看到显着的差异。添加一些环境照明,随着环境光源变强,这些差异的刺眼度会降低,直到某个时候,它压倒手电筒,所有东西看起来都被均匀照亮。
祝你好运,希望你能够达到你想要的效果。
Since you can use 2 light sources, I would try using a dim light to act as an ambient background light and a somewhat stronger directional light to give contrast to the surfaces.
I am not a 3d expert, but would think of it this way:
In a dark room (no ambient light), with a flashlight (the directional light), you will see dramatic differences based on the angle of the surface to your flashlight. Add some ambient lighting and the harshness of those differences decreases as your ambient light source gets stronger, until at some point, it overpowers the flashlight and everything appears evenly lit.
Good luck, hope you are able to achieve the effect you are after.