- Day 1: Bower - 管理你的客户端依赖关系
- Day 2: AngularJS - 对 AngularJS 的初步认识
- Day 3: Flask - 使用 Python 和 OpenShift 进行即时 Web 开发
- Day 4:PredictionIO - 如何创建一个博客推荐器
- Day 5: GruntJS - 重复乏味的工作总会有人做(反正我不做)
- Day 6:在 Java 虚拟机上使用 Grails 进行快速 Web 开发
- Day 7: GruntJS 在线重载 提升生产率至新境界
- Day 8: Harp.JS - 现代静态 web 服务器
- Day 9: TextBlob - 对文本进行情感分析
- Day 10: PhoneGap - 开发手机应用如此简单
- Day 11: AeroGear 推送服务器:使应用的通知推送变得简单
- Day 12: OpenCV - Java 开发者的人脸检测
- Day 13: Dropwizard - 非常棒的 Java REST 服务器栈
- Day14:使用斯坦福 NER 软件包实现你自己的命名实体识别器(Named Entity Recognition,NER)
- Day 15:Meteor - 从零开始创建一个 Web 应用
- Day 16: Goose Extractor - 好用的文章提取工具
- Day 17: 使用 JBoss Forge 和 OpenShift 构建部署 JAVA EE 6 应用
- Day 18: BoilerPipe - Java 开发者的文章提取工具
- Day 19: EmberJS 入门指南
- Day 20: 斯坦福 CoreNLP - 用 Java 给 Twitter 进行情感分析
- Day 21:Docker 入门教程
- Day 22: 使用 Spring、MongoDB 和 AngularJS 开发单页面应用
- Day 23:使用 TimelineJS 构建精美的时间轴
- Day 24: 使用 Yeoman 自动构建 Ember 项目
- Day 25: 联合 Tornado、MongoDB 和 AngularJS 进行应用开发
- Day 26: TogetherJS - 让我们一起来编程!
- Day 27: Restify - 在 Node.js 中构建正确的 REST Web 服务
- Day 28: OpenShift 的 Eclipse 集成
- Day 29:编写你的第一个 Google Chrome 扩展程序
- Day 30: Play Framework - Java 开发者的梦想框架
Day 7: GruntJS 在线重载 提升生产率至新境界
在我的 “30 天学习 30 种技术” 挑战的第 5 天,我提到了 如何使用 GruntJS 来执行重复性任务 。今天,我们将把上次提到的例子扩展一下,加入 HTML 模板和在线重载服务。本文将首先介绍 grunt-markdown 插件如何配合 HTML 模板使用,接着我将介绍如何使用 grunt-watch 插件将工作效率提升至新层次。如果你不熟悉 GruntJS,请先阅读 我关于 GruntJS 的文章 。

Github 仓库
今天的示例代码可以从 github: day7-gruntjs-livereload-example 中获取。
配合模板使用 GruntJS 的 Markdown 插件
在我上一篇 GruntJS 文章中,我提到了我们可以通过 grunt-markdown 插件将 Markdown 文档转换成 HTML 文档。为了让 blog 的页面好看一点,我决定使用 Twitter Bootstrap 风格。这就要求我们指定 grunt-markdown 插件将使用的 HTML 模板,这很容易,我们只需指定模板配置选项。
markdown: {
  all: {
    files: [
    {
      expand: true,
      src: '*.md',
      dest: 'docs/html/',
      ext: '.html'
    }
    ],
    options: {
    template: 'templates/index.html',
    markdownOptions: {
      gfm: true,
      codeLines: {
      before: '<span>',
      after: '</span>'
      }
    }
    }
  }
  },
template/index.html 看起来大致是这样的:
<!DOCTYPE html>
<html>
<head>
  <title>Learn 30 Technologies in 30 Days</title>
  <meta name="viewport" content="width=device-width, initial-scale=1.0">
  <link rel="stylesheet" type="text/css" href="../../css/bootstrap.css" media="screen">
  <style type="text/css">
  body {
    padding-top:60px;
    padding-bottom: 60px;
  }
  </style>
</head>
<body>
  <div class="navbar navbar-inverse navbar-fixed-top">
    <div class="container">
    <div class="navbar-header">
      <button type="button" class="navbar-toggle" data-toggle="collapse" data-target=".navbar-collapse">
      <span class="icon-bar"></span>
      <span class="icon-bar"></span>
      <span class="icon-bar"></span>
      </button>
      <a class="navbar-brand" href="#">30 Technologies in 30 Days</a>
    </div>

  </div>
  </div>

  <div id="main" class="container">
    <%=content%>
  </div>

</body>
</html>
<%=content%> 会被 Markdown 转成的 HTML 文档替换。
再次运行 grunt 命令后,我们就能看到生成的 HTML 5 文档了。
grunt
生成的 HTML 5 文档位于 docs/html 文件夹下。

盯紧
grunt-contrib-watch 是 GruntJS 最重要的插件之一。这个插件可以在后台运行,监视配置好了的文件改动。使用如下的 npm 命令安装 grunt-contrib-watch 插件。
npm install grunt-contrib-watch --save-dev
上面的命令将更新 package.json 中的依赖。
{
  "name": "blog",
  "version": "0.0.0",
  "description": "My awesome blog",
  "devDependencies": {
  "grunt": "~0.4.1",
  "grunt-contrib-uglify": "~0.2.5",
  "grunt-markdown": "~0.4.0",
  "grunt-contrib-watch": "~0.5.3"
  }
}
和其他插件一样,接下来的任务是在 Gruntfile.js 中配置插件,我们需要将如下的代码加入到 grunt 的 initConfig 方法。这些代码确保一旦文件变动,grunt 将运行 uglify 和 markdown 任务
watch :{
  scripts :{
    files : ['js/app.js','*.md','css/*.css'],
    tasks : ['uglify','markdown']
  }
  }
将下面这行加入 Gruntfile,添加 watch 任务。
grunt.loadNpmTasks('grunt-contrib-watch');
运行 grunt watch 命令便可调用 Grunt 的 watch 任务。
$ grunt watch
Running "watch" task
Waiting...
现在我们修改下 js 文件夹下的 app.js 文件。将如下函数添加到 app.js 。
function goodNight(name){
  return "Good Night, " + name;
}
一旦我们增加了这个函数,Grunt 的 watch 任务会同时运行 uglify 和 markdown 任务。
$ grunt watch
Running "watch" task
Waiting...OK
>> File "js/app.js" changed.

Running "uglify:build" (uglify) task
File "js/app.min.js" created.

Running "markdown:all" (markdown) task
File "docs/html/day1.html" created.

Done, without errors.
Completed in 0.580s at Sun Nov 03 2013 00:15:54 GMT+0530 (IST) - Waiting...
为了确保变动已经加入,我们查看下更新过的 app.min.js 文件。
function hello(a){return"Hello, "+a+"! How are you?"}function bye(a){return"Bye, "+a}function goodNight(a){return"Good Night, "+a}
类似地,如果我们修改了 Markdown 文件,新 HTML 文档也会被创建。
使用 livereload
GruntJS 的特性之一就是它可以自动重载改动。这非常有用,比如我们修改了样式之后不用点击浏览器的刷新按钮就能看到改动。将 watch 插件的配置修改下就能使用在线重载啦。
watch :{
  scripts :{
    files : ['js/app.js','*.md','css/*.css'],
    tasks : ['uglify','markdown'],
    options : {
    livereload : true
    }
  }
  }
这会在 http://localhost:35729/ 启动服务。我们也可以修改端口号:
watch :{
  scripts :{
    files : ['js/app.js','*.md','css/*.css'],
    tasks : ['uglify','markdown'],
    options : {
    livereload : 9090,
    }
  }
  }
重启服务器,现在可以访问 http://localhost:9090/
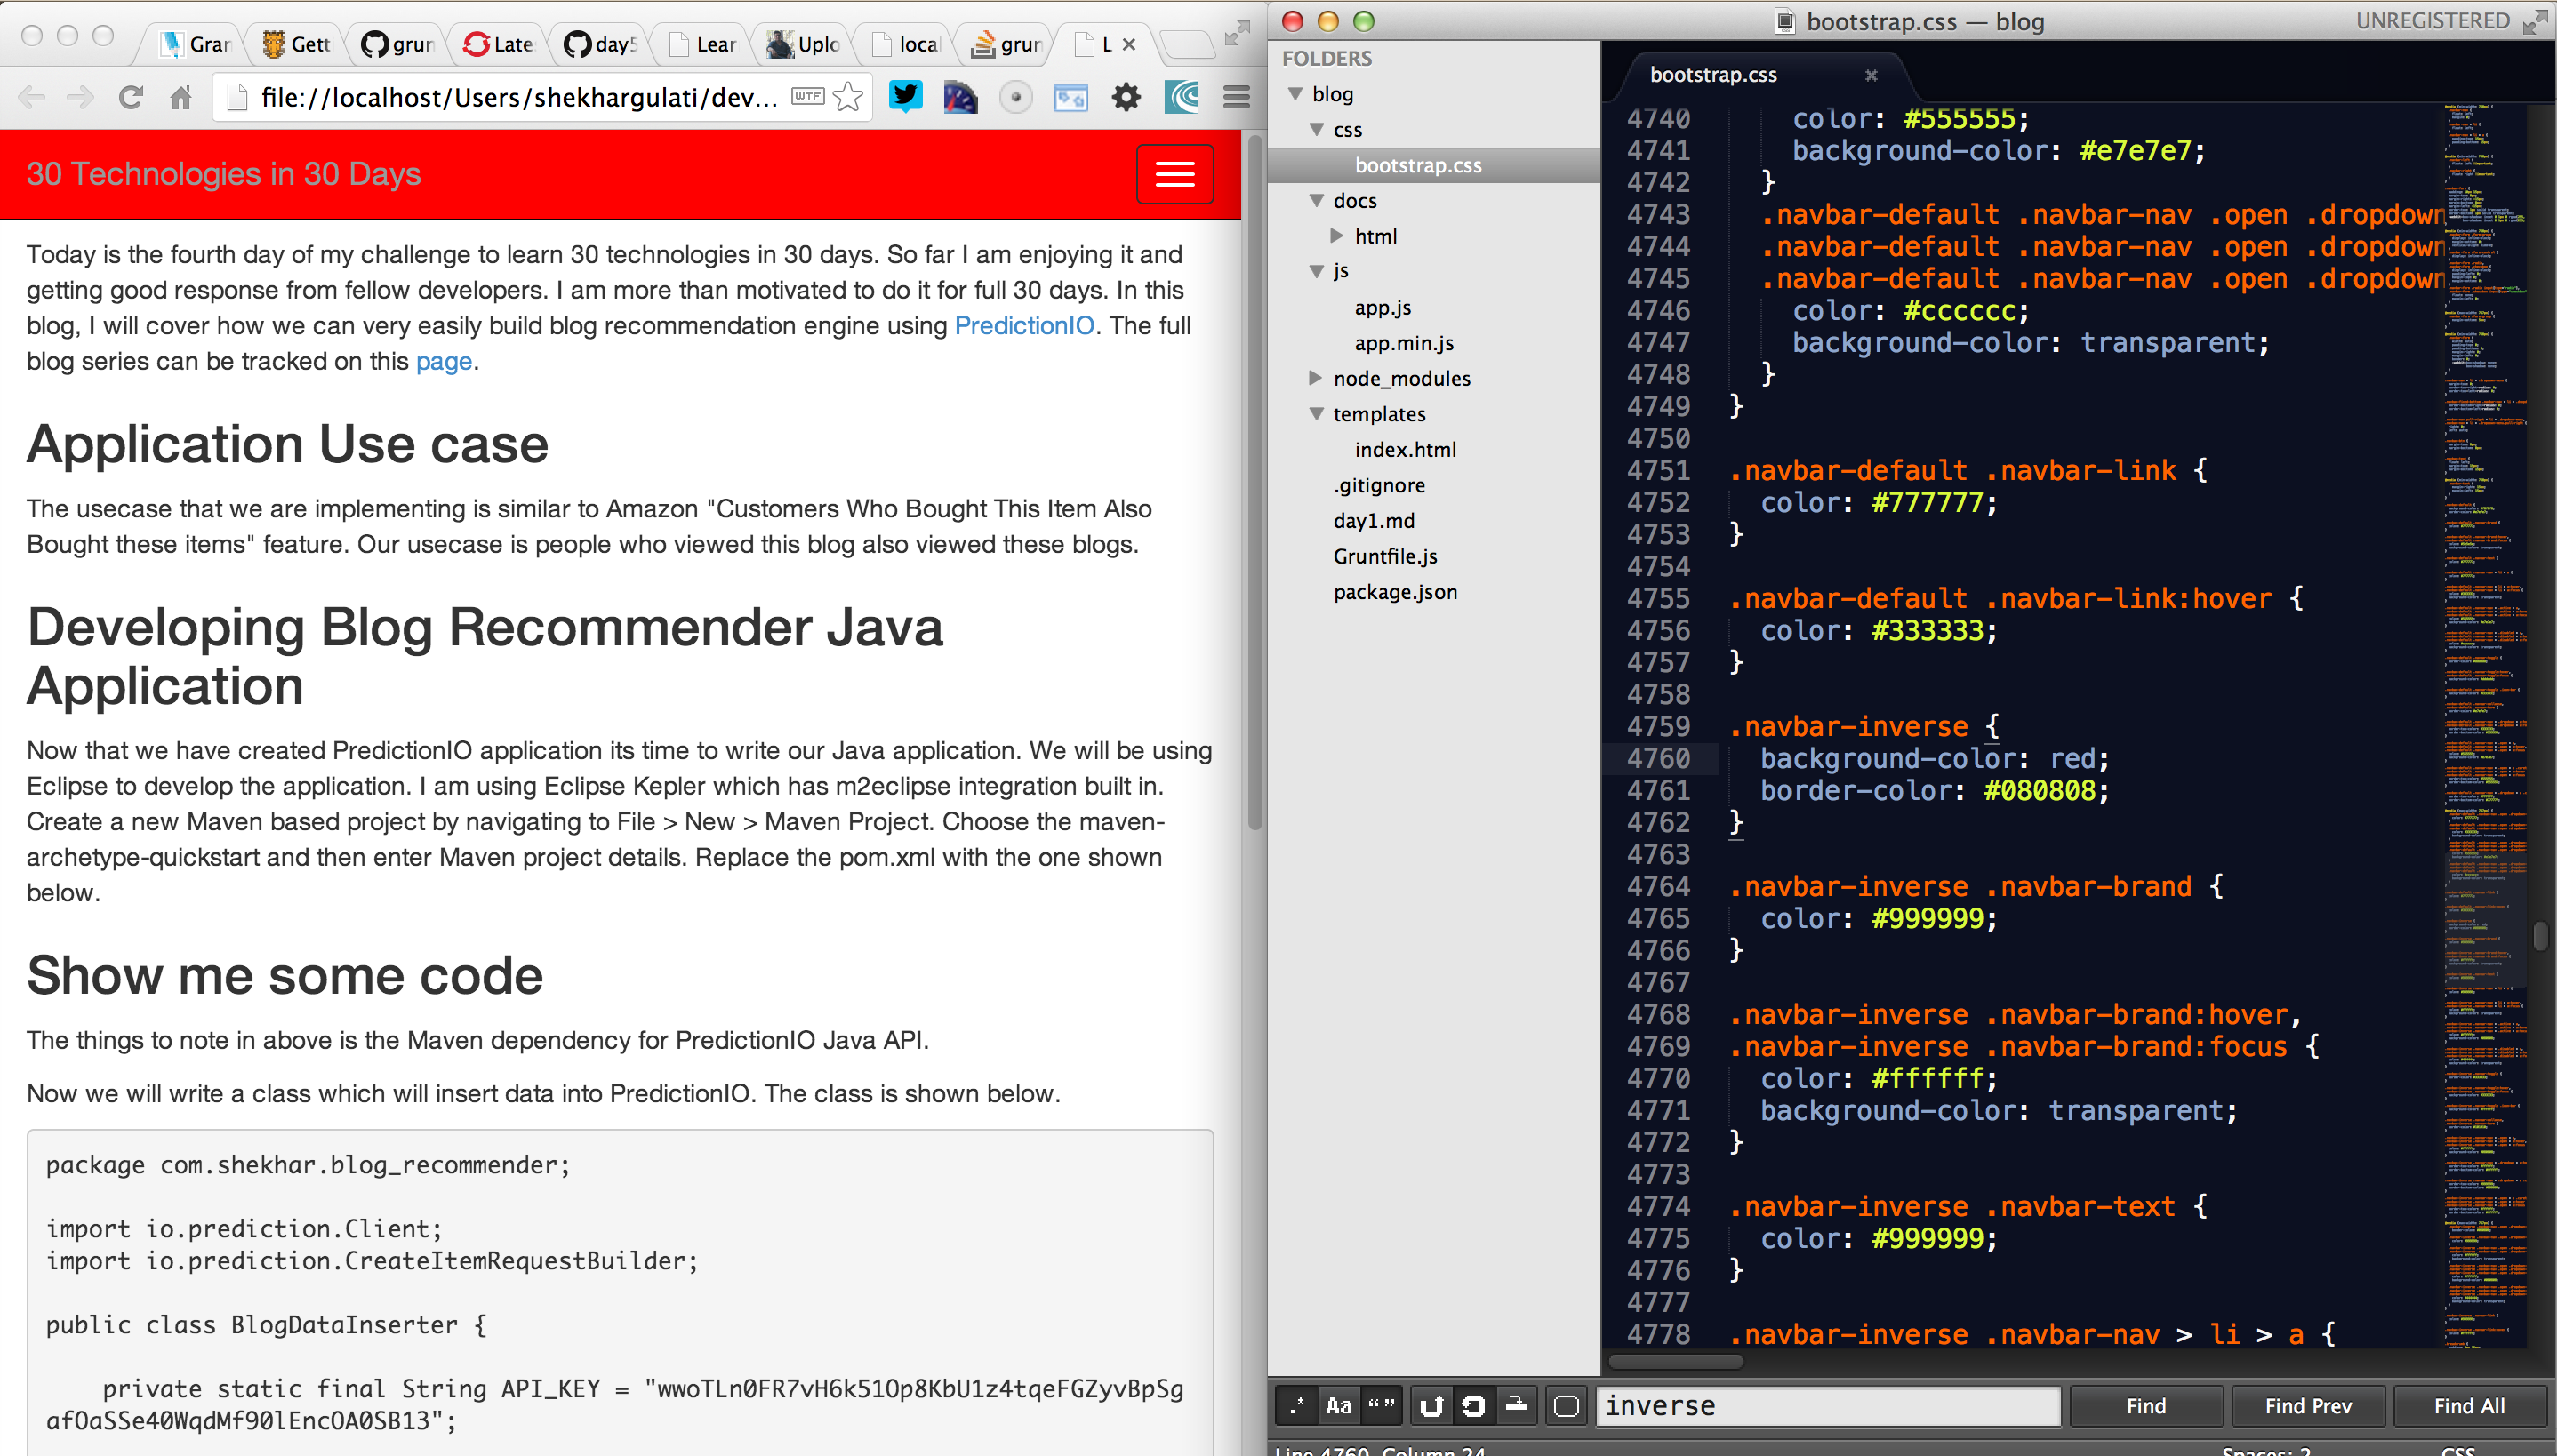
为了启用在线重载,我们需要将以下内容加入到 templates/index.html 文件中。
<script src="http://localhost:9090/livereload.js"></script>
重启服务器,修改下 bootstrap.css ,将
.navbar-inverse {
  background-color: #222222;
  border-color: #080808;
}
改成
.navbar-inverse {
  background-color: red;
  border-color: #080808;
}
我们马上就能在 docs/html/day1.html 中看到变化。
https://www.openshift.com/sites/default/files/images/livereloading-in-action.png
今天就到这里了。欢迎继续反馈。
如果你对这篇内容有疑问,欢迎到本站社区发帖提问 参与讨论,获取更多帮助,或者扫码二维码加入 Web 技术交流群。

绑定邮箱获取回复消息
由于您还没有绑定你的真实邮箱,如果其他用户或者作者回复了您的评论,将不能在第一时间通知您!
发布评论